RSS

Category Archives: Naturally Better

Look good and feel great naturally….

Life Changing Habits


​Have you ever started your day with an icy cold shower? Even when it is 2 degrees?!?!!? Well, I did a month ago! And I must admit it is one of the most invigorating things you can do! It is great for blood circulation, increases immunity, the best way to become alert instantly, makes it easier to sleep at night, aids weight loss, reduces depression and anxiety and is one of the best tests of your will power! And if you cringed and went… “No way”, that’s fine…. if nothing else, I have your attention for the next few minutes!

Good habits are hard to develop but even harder to give up! You heard me, once you start on a journey of good habits, you find it beneficial in so many ways, you don’t want to give it up!

On the 1st of July 2021, I decided to do these 10 things everyday! It was super hard to start with, but within a week it got easier and now its a breeze! My principle – Keep It Super Simple (KISS) and doable.

So let me tell you what i do…

  • Hydrate in the morning: I wake up every morning and drink 500mls of water. (I use a copper bottle for its numerous benefits.). I started it because it said, it helps with acidity. But its benefits are manifold. You can read all benefits of this practice here.
Yes, drinking more water may help you lose weight | Hub

Bye bye acidity!​​

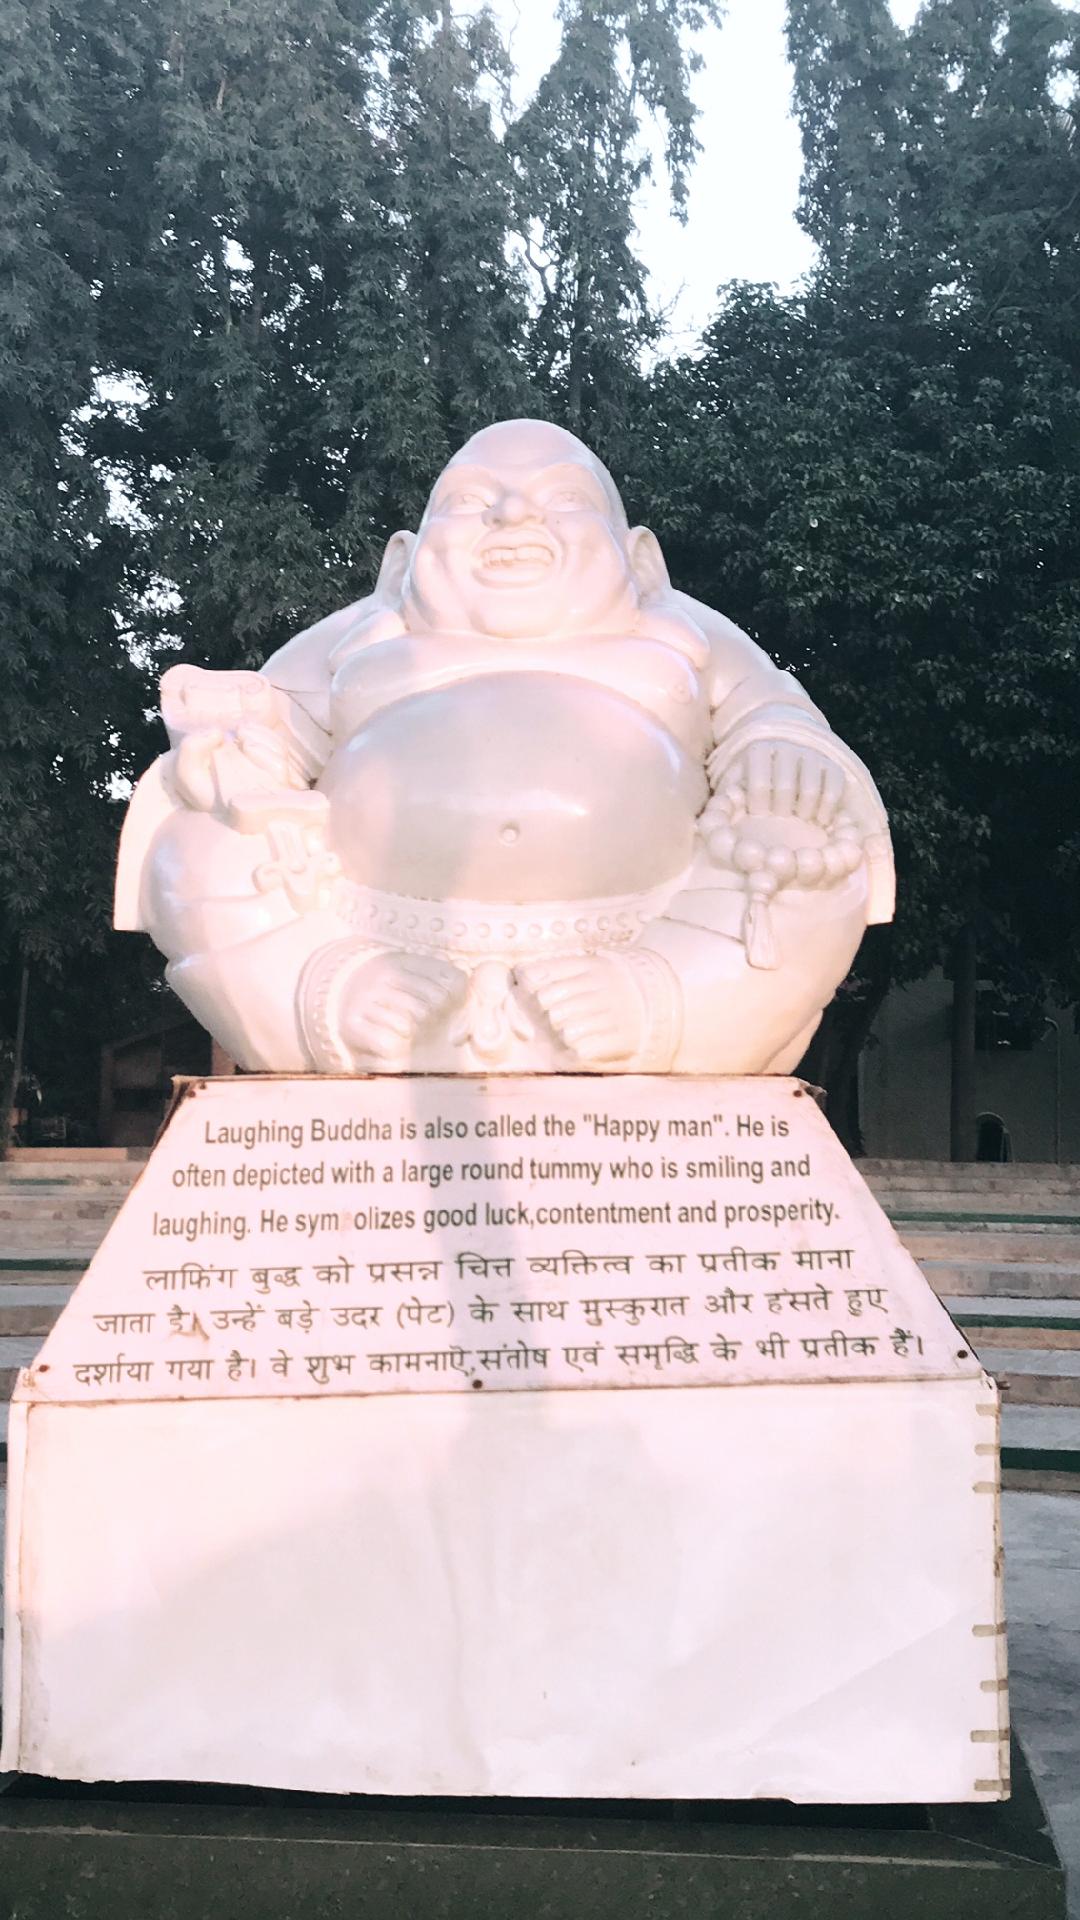
  • Silence is golden: The morning is an amazingly rich time period of the day, the first few moments of consciousness after a long rest. It’s also when we tend to make the most mistakes because we haven’t had that pause and don’t get our bearings.  Science now knows we receive a rush of gamma waves to the right side of the brain when we pause in the morning and avoid jumping right into stress. You can learn more about how this works in Brigid Schulte’s amazing book about how to manage your time in a hectic world and what happens to our brains when we rest. I spend 40 min in silence. Yoganidra is how I do it, but you can find your own.

Hello productivity!

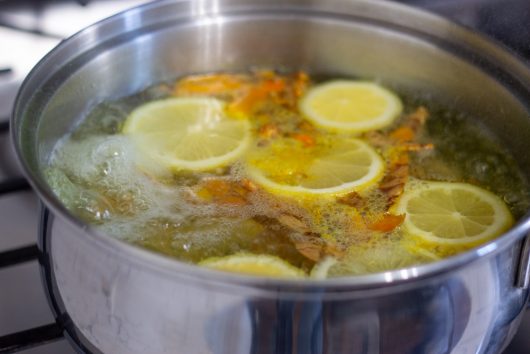
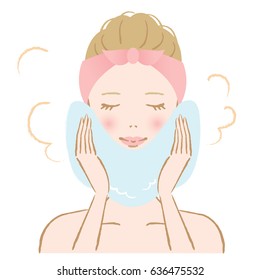
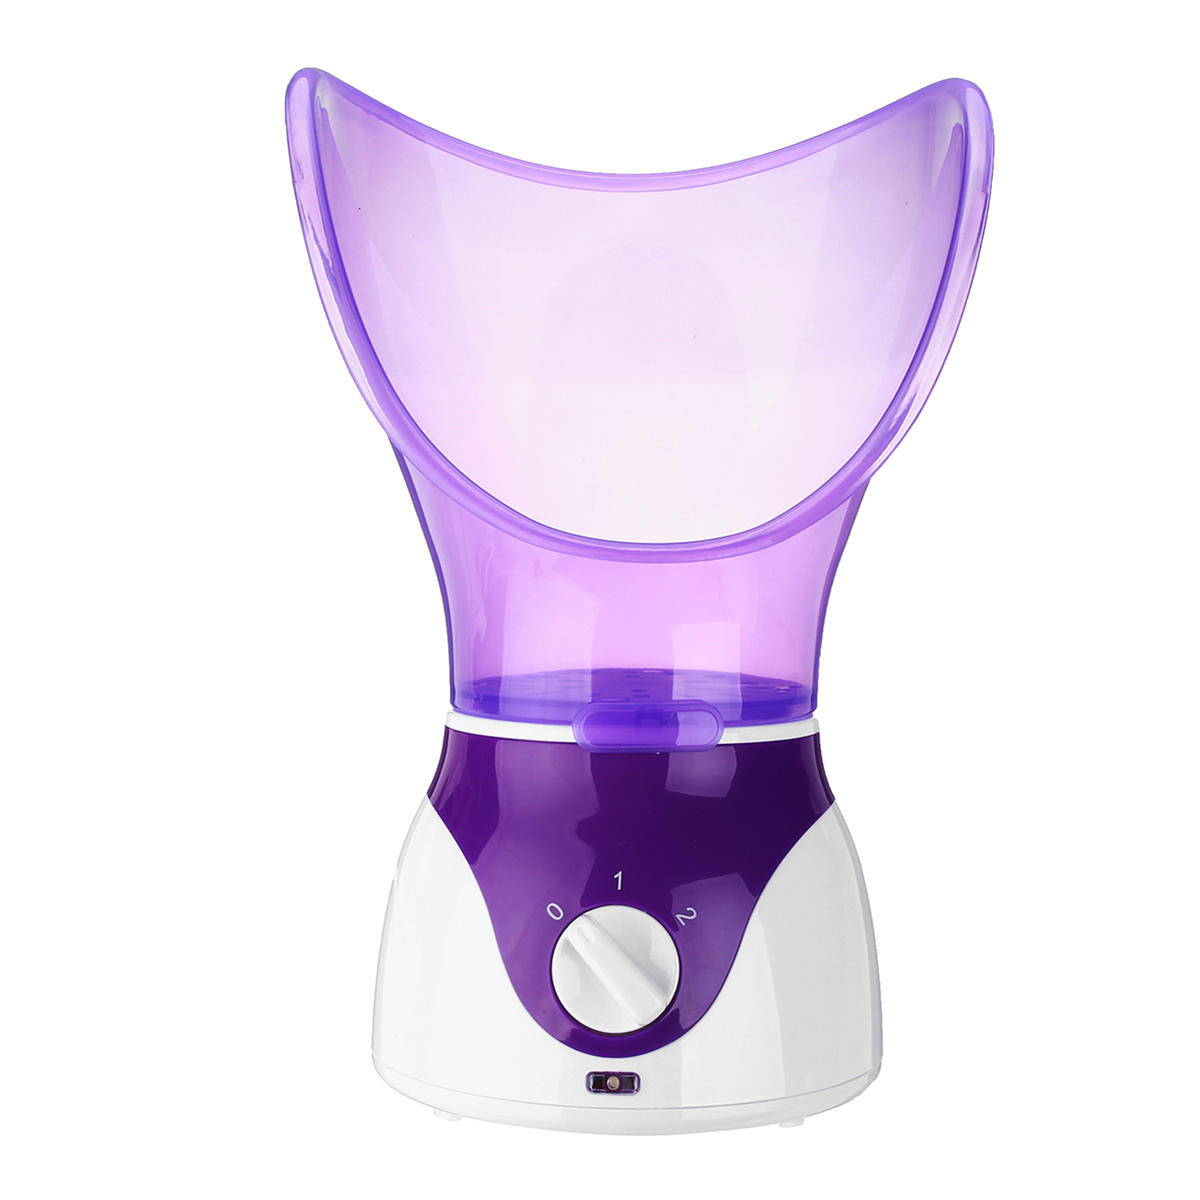
  • Nose is the pathway: The nose is one of the ways we can inhale all kinds of germs that then lodge themselves inside the body. So a healthy nose is paramount to a healthy body. So, twice a day I steam the nose with water infused with salt, baking soda, eucalyptus oil, menthol and camphor for 2-3 minutes! I top it up with application of ghee (you can use Sesame oil) to the inside of the nostril, to keep the nasal passage lubricated.
10 Best Facial Steamers For Sinuses In 2021 – Reviews & Buying Guide

Bye bye harmful germs!

Does Tea and Coffee Dehydrate You? | Eat This Not That
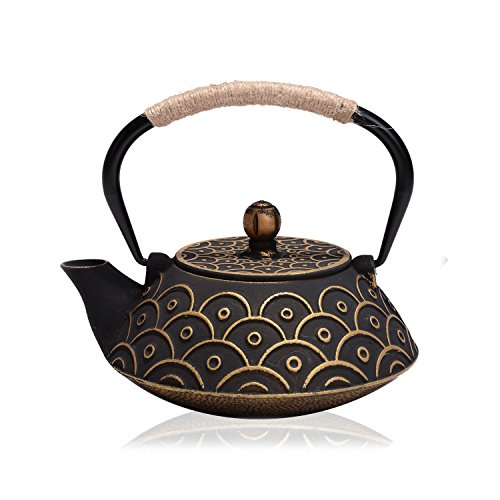
  • ImmuniTea: As caffeine is a central body stimulant, it impacts your body in several different ways. While the majority of people will opt for caffeine in some form and use as intended, the immediate health effects might make you consider cutting back or swapping for a herbal infusion instead. Generally, a coffee a day won’t do you any harm. But the alternative is pretty sweet… You can try various herbal teas and see which one actually replaces that morning coffee. I have swapped morning coffee for Turmeric and Ginger ImmuniTea.

Hello immunity!

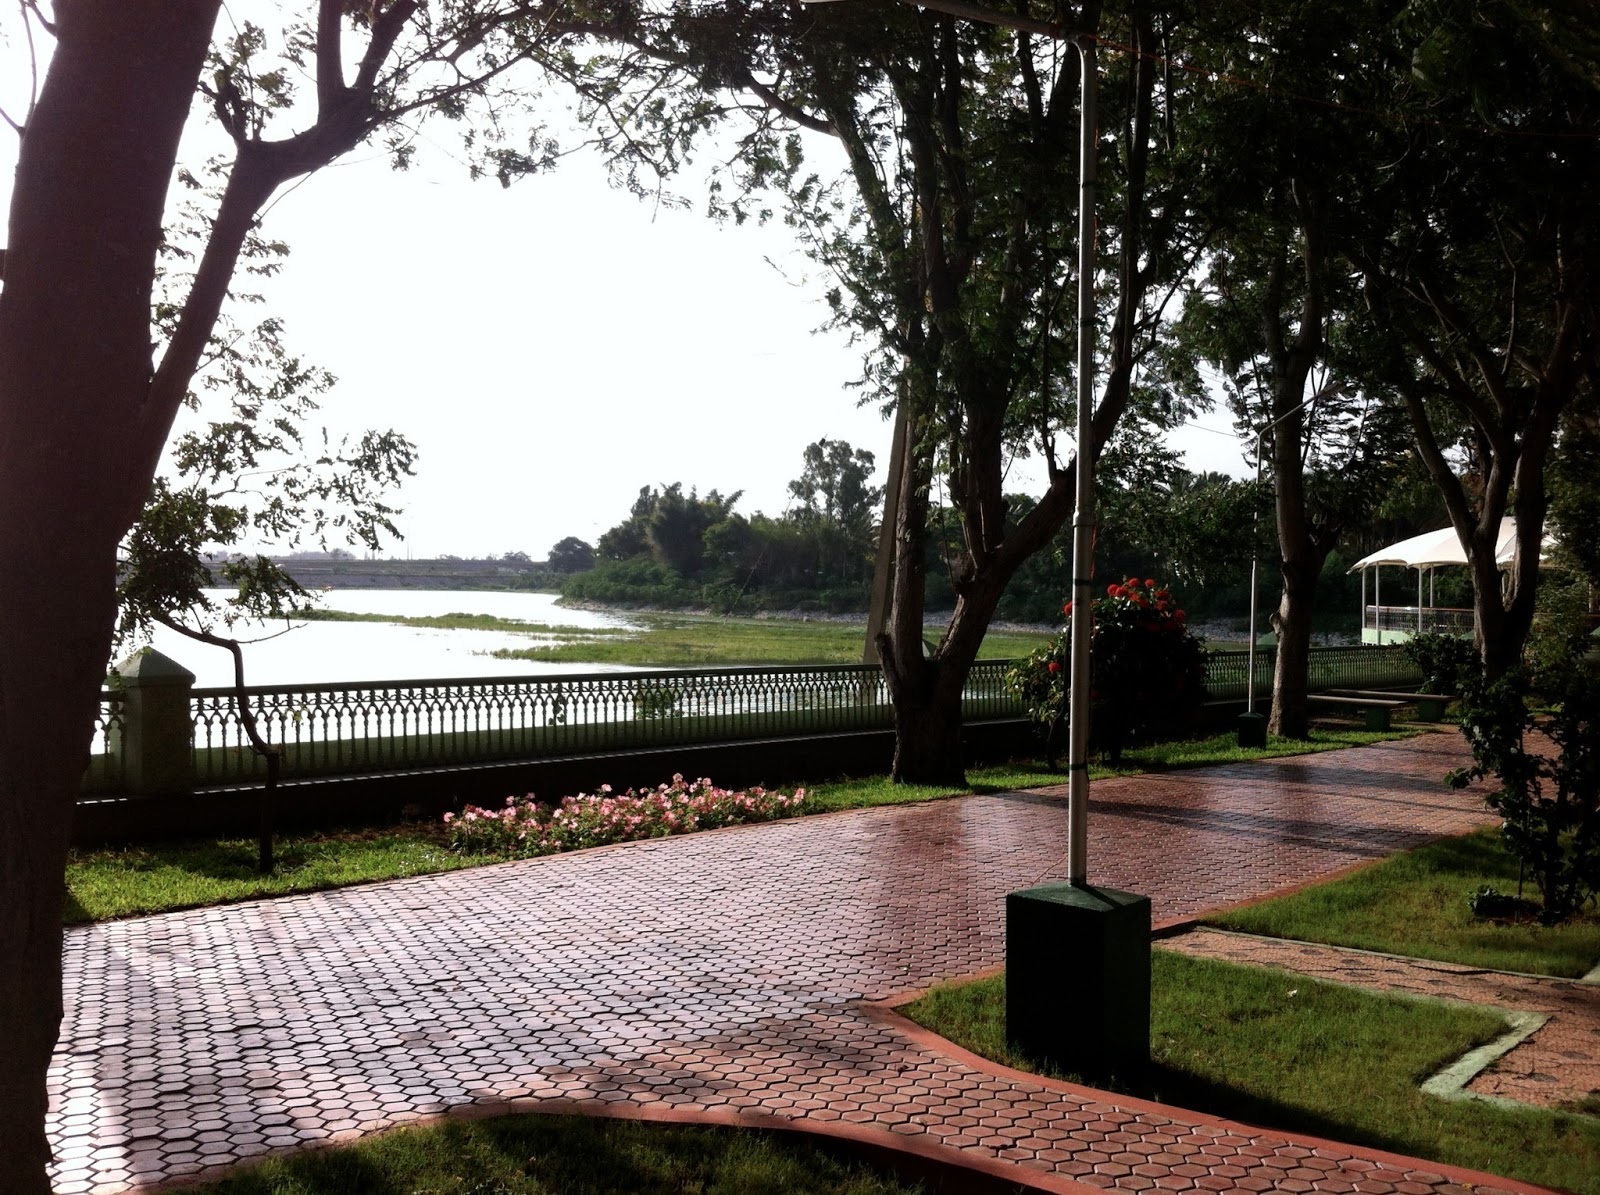
  • Walk for health: Walking is a great way to improve or maintain your overall health. Just 30 minutes every day can increase cardiovascular fitness, strengthen bones, reduce excess body fat, and boost muscle power and endurance. It can also reduce your risk of developing conditions such as heart disease, type 2 diabetes, osteoporosis and some cancers. Unlike some other forms of exercise, walking is free and doesn’t require any special equipment or training. I walk at my own pace for 40 min twice everyday. I listen to podcasts on self-improvement, finance and investments, book reviews to keep the mind active as well.
10 Brilliant Evening Walk Benefits for Health You Must Know

Hello good health!

  • Intermittent fasting: Intermittent fasting is a form of time-restricted fasting. It involves consuming foods during a window and avoiding food, or fasting, for the remaining each day. I follow 16:8, where I don’t eat anything for 16 hours and eat in the 8 hours. I make sure that I get all the nutrients I need, keep myself hydrated and ensure I get good sleep. I have swapped a carb rich, fat rich breakfast for a Protein shake with fruits seeds and nuts! I have a large Indian meal for lunch (Rotis, Vegetables, Dal, Yoghurt and a salad for lunch) and a simple meal (Idlis or Curd Rice) for dinner. If I have to eat a pizza or noodles, I do it at lunch time so that the body has enough time to digest it before I sleep at night. All the body then has to do while I sleep is repair!

Hello supporting the body’s circadian rhythm!

  • Exercise at least for 2 minutes everyday: Yep you head me… Just two minutes of stretching and/or core strength exercise. Push-ups, plank, Sit-ups or Sun Salutations!  Anything you can do within 2 minutes! Mix it up! Whatever it takes to get the body moving! More is better but less is not bad either!

Hello flexibility, bye bye lethargy!

walking | Playing "Grown-Ups"
  • Walk while you talk: There is nothing better than to get the body moving. It is also great for the brain. I have swapped one meeting each day to go without video and choose to walk while I listen! A meeting of 30 minutes will get a minimum of 1000 steps on to your pedometer! It is also harder to speak when you are walking so you develop the art of listening!

Hello Good listener!

  • Readers are leaders: President Harry S. Truman famously said, “Not all readers are leaders, but all leaders are readers.” Knowledge is power, and reading is arguably one of the best ways to get ahead in your career. Through reading, you can become an expert in any subject, gain wisdom from some of the most intelligent people in the world, and develop skills necessary to become an influential and effective leader. I read for 40 minutes everyday! One fiction and one non fiction.

Hello knowledge! Hello Power

Something new each day: Someone once said, “Don’t expect a different result when you do the same thing in the same way.” One of the biggest challenges facing people today is that they feel like life is just passing them by. How is it the end of July?! When you do the same thing every day, time merges and it passes us by quicker than it should.

Author challenges herself to do something new every day in 'I Dare Me'

However, every day we are offered the opportunity to do things differently. We just need to be willing to see, touch, taste, smell and hear everything that life offers us. These are some simple ways I add a little variety to my day.

  • Try a new food or drink
  • Take a new route when driving, running or walking
  • Change my exercise routine or start a new one
  • Visit a new place.

The list of things we can do differently is endless. When you start to change the way of doing things, you expand your mindset and make room for opportunities.

Hello creativity!!

It is now like a must do! I love the time I spend away from social media and phone (sorry I do read on an eReader L) . I watch news at the most twice a day (mostly to keep abreast with Olympics). I sleep well because I have had plenty of exercise, Vitamin D and a light stomach. I can concentrate and am more aware of what I do, increasing my ability to remember better!

Try it everyone! KISS your COVID blues away! You can do as much or as little! And if you do something different, share the knowledge! Would love to try anything new!

 
Leave a comment

Posted by on August 2, 2021 in Naturally Better


GARSHANA – Dry Body Brushing


It is autumn in the Southern hemisphere and spring in the Northern hemisphere. During both these seasons the Kapha Dosha. Kapha represents water and earth and governs our bodies insulation (fat layers) and our protective facilities, like our immune system. Our bodies during this time tend to be imbalanced, and can make us feel sluggish and tired. Ayurveda to the rescue.

The skin is the largest organ in our body. The skin helps us eliminate up to one third of our bodies toxins. As we age, it becomes more difficult for our bodies to shed the outer layers of skin. This leads to less efficient elimination of toxins, and places extra stress on other organs involved in removing toxins from the body – like our liver and kidneys.

Garshana, (pronounced gar-shun-uh), is an Ayurvedic abhyanaga. The word in Sanskrit literally translates to ‘friction by rubbing.’ Fast gaining traction in the Western world, it is commonly known as dry brushing.

The practice of Garshana involves a stimulating lymphatic massage to detoxify the lymphatic system, refresh your skin and revive the mind. This methodical brushing takes  helps to remove dry and dead skin cells by dry brushing each morning not only helps improve your body’s ability to eliminate toxins, but it also improves the function of your sweat and secretion glands, turning your body back into the well-oiled machine it should be.

I know your mind is asking you many question as to what, why and how Garshana. Let me break the information down for you…


WHAT IS GARSHANA


The lymphatic system transports lymph, a fluid containing infection-fighting white blood cells, throughout the body. In doing so, it acts as the drainage system of the body, helping to remove toxins, waste and other unwanted materials which are known as ama in Ayurveda. 

Unlike the circulatory system which has the heart to initiate movement, the lymphatic system does not move on its own. To maintain proper function, the lymphatic system needs daily deep breathing, cardio exercise, yoga, and garshana or abhyanga massage. Modern day sedentary lifestyle however does not allow for most or safe to say any of these activities, rendering the lymphatic drainage process inefficient or “sluggish”

Garshana is an easy and effective way to improve lymphatic drainage and improve overall mind and body health. It takes just 3-5 minutes and has no adverse effects.

BENEFITS of GARSHANA

As I mentioned, Garshana helps to balance the Kapha Dosha.Garshana also has a plethora of other benefits for your health and beauty:

  • Detoxifies the lymphatic system
  • Expels ama (toxins)
  • Stimulates blood flow 
  • Increases circulation
  • Warms the body
  • Improves energy
  • Promotes mental alertness
  • Exfoliates the skin
  • Encourages cellular renewal
  • Revives skin tone + texture
  • Combats cellulite

GARSHANA METHOD: AT-HOME DRY BRUSHING TECHNIQUE

Vegan Dry Body Brush

It is best to brush toward the heart to assist the movement of lymph in the body, applying as much pressure as comfortable. Exert more force in areas of fatty tissue & brush gently on sensitive areas.

To dry brush your body use a natural brush (available online, or in your local health food store).

  1. Dry brush before you shower to remove dead skin.  Use upward strokes, as firm as is comfortable. Start with your extremities- first with the bottoms of your feet and work up the ankles and legs all the way to your hips. Work your way towards the heart. Pay close attention to inner thighs, to help your lymphatic system.
  2. Next move on to your arms again working your way towards your heart. Pay close attention to armpits (the added benefit of dry brushing is stimulating our lymphatic system, which relies on our muscle movement to circulate lymph fluid).
  3. Next, brush your back as best you can. There are brushes with handles that can help. But if you can’t get one of those, then brush the back as best as you can.
  4. Finally, work on your abdominal area. Working in a clockwise direction, brush until your skin is rosy and tingles a little. This can also help to stimulate our colon helping us with another step in the morning self-care ritual (emptying the bowels).
  5. Finally work on your chest and neck. This is delicate skin so you use care.
  6. Hop in the shower. The warm shower will wash off the dead cells. After the shower, when the pores are open apply a good quality body oil and seal in the good moisture.
  7. Remember to use your intuition and avoid sensitive areas and areas with broken skin. Wash and dry your brush periodically.

Tip for easy clean up: Stand in the shower cubicle or on a towel to perform Garshana as dead skin cells can be sloughed off in the process. 

 
Do not perform Garshana if: 

  • your skin is extremely sensitive
  • you have a sunburn
  • you are experiencing inflamed skin
  • you have a skin condition like psoriasis or eczema
  • you have any open wounds
  • you are feeling ill

 
Ayurveda has taught for centuries that in order to stay healthy and vibrant, we need to tune into the rhythms of nature and mimic the earth’s intuitive understanding that everything changes, nothing is forever and that it is important to continuously flow with the energy of the seasons. This time of year, no matter which hemisphere you are on, I encourage you to invite in this Ayurvedic ritual to keep your self-care routine feeling fresh, vibrant and fun! Trust me it is better than a hot cup of coffee

Wishing you and your family a healthy and abundant season!

 
Leave a comment

Posted by on February 26, 2021 in Naturally Better


Yoganidra – Dynamic Sleep


Yoga Nidra Guided meditation for deep relaxation

One of the pillars of wellness is a good night’s sleep. I have always been a light sleeper and as I went through a tough period in my life, my sleep became more and more abysmal. I woke up at unearthly hours and couldn’t back to sleep. This left me tired during the day and the domino effect of lack of exercise because I was too tired and associated weight gain etc. etc.

If this rings a bell with you…. Read on.

While there’s no substitute for a great night’s sleep, there is a particular combination of meditation and yoga that comes close. It is called YOGANIDRA (pronounced Yog-Nid-Ra) or Yogic Sleep. It is believed that one 30-minute practice of Yoganidra equals approximately two hours of deep sleep and that grows exponentially as you increase the time you practice this form of meditation. Remember the famous power nap in the middle of the day? Yoganidra gives that nap an oomph!

WHAT IS YOGANIDRA?

Yoganidra, also known as dynamic sleep, prompts the body to relax deeply while the mind remains inwardly alert. Yoganidra pioneer, Swami Satyananda Saraswati, refers to it as “reaching the border between waking and sleeping states.” The more ‘scientific’ way to explain it is that place in the middle of alpha and delta brainwave states. Sound complicated and impossible to achieve, well it is not.

Yoganidra is a form of guided meditation. To practice, you begin by lying on the floor (face up) in Shavasana or corpse pose. Then, based upon the guided meditation you’re following, you’re prompted to begin sensing the body and breathing in specific ways to incite a relaxation response in you. This relaxation response is the secret to yoganidra, because it balances the sympathetic and parasympathetic nervous systems – the left and right brain –allowing you to unwind into various, beneficial brain wave states. Trust me, it is not as hard as it reads.

TECHNICALLY HOW DOES YOGANIDRA WORK

I am neither a Scientist nor out there to prove a point. But if you are, then what Google has to say may help you resolve whether or not you want to follow this practice.

The brain has four states of activity – beta, alpha, theta, and delta. Yoganidra works by gently guiding you through all these stages in a systematic manner. In the end, the goal is to achieve the state between wakefulness and sleep. It’s that magical time just before you fall asleep when the body rests while the mind is still reasonably lucid.

As the practitioner guides the mind through  the stages of active thinking that’s characteristic of the beta wave state to the relaxed, thoughtless alpha wave state and the drops you deeper into the theta wave state where your thoughts slow down to 4 to 8 thoughts per second. This is the stage where you learn the most.

Finally, the guided meditation takes you to the delta state, where you have approximately 1 to 3.9 thoughts per second. Delta is known to be the most restorative state for the mind and body; your organs regenerate and heal, and the stress hormone cortisol is released from your body. When you’re put under anaesthesia, you’re put into a delta brain-wave state. And given the stress and lifestyle we lead most of us struggle to achieve theta and delta sleep in any given night so quite simply put, our bodies lack the opportunity to restore and heal themselves entirely.

There is of course a deeper brain-wave state that delta is one that can’t be reached through conventional sleep. In this fourth state of consciousness, below delta, your brain is thoughtless. This state is one where you are awake but have no consciousness!  This thoughtless state is one of such a deep surrender, where your consciousness is so far away from the physical body, that living here every day would be difficult. Not everyone who practices yoganidra touches this state, but the more you practice, the more you’ll receive glimpses of it. After all, over-thinking is precisely what causes decision fatigue — those times when it feels nearly impossible to make a good choice because you’re actually overwhelmed by choice. Yoganidra takes you out of that decision conundrum and resets your mind. Awesome right?!?!

WHAT ARE THE OTHER SCIENCE-BASED BENEFITS OF A YOGANIDRA?

Feeling well rested is life changing. If yoganidra had no other benefits, it would still be worth it! Similar to a mini vacation or retreat for your mind, yoganidra is the perfect way to end a busy day.

As this practice is gaining popularity, more and more research is being undertaken to back the results with scientific evidence. From studies done on a sample group, it has been found

  • Diminished stress, depression and anxiety levels significantly.
  • Females with PMS symptoms showed improvement in symptoms after 6 months of yoganidra, which proved to be particularly beneficial for hormone regulation.
  • 30 minutes of yoganidra for 90 days stabilized blood glucose levels in diabetics
  • Military combat veterans reported alleviation of post-traumatic stress disorder (PTSD) symptoms like rage and anxiety and increased feelings of relaxation and peace

On a personal note I have benefited greatly from this practice. I was introduced to it by a dear friend and superb Yoga teacher about a year back. I generally have no trouble going to sleep, but find it hard to stay asleep. So I practice Yoganidra when I wake up and I sleep soundly and wake up refreshed. As I mentioned before I have had a tough year and practice of Yoganidra has helped with my depression and anxiety too.

HOW DO YOU PRACTICE YOGA NIDRA?

To follow this practice you firstly need a practitioner to guide you through the process. I follow Swami Niranjananda Saraswati in Hindi on Youtube. There are multiple other practitioners whom you can follow, just google and settle for the voice best suited for you.

Next, you will need to lie down comfortably— remember to cover yourself because you may get cold and you should not move at that point and break the trance. The goal is to make yourself as comfortable as possible because you’ll be in this position for at least 20 minutes. I practice the one that goes for an hour.

First, the guru will get you to set a Sankalpa or deepest intention for the practice. You’ll then be asked to scan your body and notice sensations. You’ll become aware of your breath and the meditation will provide guided instruction as to how to breathe to drop deeper into your resting state. You’ll also embark upon guided visualisations of light and greater awareness of distant noises. It’s at this point that the magic starts to happen as you drop deeper and deeper into those brain waves states.

At the end of the practice, you will be guided back to the present and conscious state of reality. You will restate your Sankalpa. You will bring yourself back to a seating position to honour the space you’ve created, feeling deeply at peace. You will then chant “Om Shanti” three times – once to denote peace for self, second time for your family and friends and once for the whole universe.

I find this practice most calming (I am quite flighty by nature!). It grounds me, give me the rest my active mind needs and I feel refreshed when I wake up! No more 2:30am articles for me!!!

 
Leave a comment

Posted by on August 3, 2020 in Naturally Better


Tags: , , ,

Facial Steaming


In Ayurveda Steaming or Svedana holds an important position in your beauty regimen. It is believed that heat generated by the steam makes the skin sweat which literally flushes the skin of all the toxins which can then be cleansed to leave the skin clean, healthy and glowing. Facial steaming improves blood circulation resulting in an increase in nutrients and oxygen is supplied to the skin cells which prevents wrinkles.

If you’ve ever been for a facial, you’ll know that one of the first things they do is steam your face, but have you ever asked why?  What is facial steaming? What are the benefits? How can I do it at home?

Let me try to break it down for you.


What is facial steaming?

Steaming involves immersing your face in a cloud of warm vapours while you simply breathe . . . for 5-10 minutes. Traditional therapies consider it an ideal remedy for clearing out your pores and softening the skin, delivering a glowing complexion.

What are the benefits?

  • Deep cleanse: The heat opens your pores meaning that bacteria, dirt and dead skin cells can be removed much easier through a gentle scrub. The added benefit is that it makes your skin far more receptive to using other treatments such as a cleanser, toner and moisturiser as you have got rid of those barriers.

  • Removes toxins: Steaming heats, the body which helps release toxins. Also, the combination of warm steam and an increase in perspiration dilates your blood vessels and increases circulation. This boost of blood flow nourishes your skin and delivers oxygen. The result is a natural, healthy glow.

  • Loosens blackheads: Blackheads and whiteheads are both a nightmare and pretty tough to get rid of. Steaming can help prevent their formation. Your skin produces sebum which lubricates and protects the skin. However, sebum can sometimes get stuck inside a follicle which leads to a blackhead. By steaming, the pores open up and the blackhead, or the sebum can melt, loosen and fall away from your pores.

  • More youthful skin: Steaming dilates blood vessels which improves blood circulation through skin cells. The increased blood flow experienced during a steam facial promotes collagen and elastin production. This results in firmer, rosy, glowing, younger-looking skin. Regular steaming can restore vitality to the skin.

  • Helps with Sinus Congestion: Steam can help relieve sinus congestion and headaches that often accompany it. Adding certain essential oils to your steam can boost the effect.


How can I do it at home?

There are a few ways you can enjoy this versatile skin treatment at home. It can be simple and free or as luxurious as you — and your wallet — choose.

Here’s a step-by-step description for each technique.


To steam over a bowl or sink of hot water How to Do a Steam Facial: 13 Steps (with Pictures) - wikiHow

  • Grab a big fluffy towel and choose a spot. Comfort is key, so if you’re doing this over a sink you’ll want to use a chair or stool that offers the right height. Otherwise, a bowl on a table is the most convenient way.

  • Secure your hair so that it’s off the face and cleanse using a gentle cleanser (AyurDeva’s Ramya foaming facewash works like magic). Don’t forget to cleanse your neck, too!

  • Bring 4 to 6 cups of water to a boil in a kettle or pot, depending on the size of the sink or bowl.

  • Reduce the heat, cover, and simmer for 2 or 3 minutes. Carefully strain into the sink or bowl. If you’re using essential oils, this is the time to add a few drops to the water.

  • Have a seat, drape your towel over your head and the pot, and hold your face 6 inches above the water.

  • Raise or lower your head for more or less heat and lift a corner of the towel to cool off if needed.

  • Steaming for 5 to 10 minutes is plenty.

To steam with warm towelsFace Towel Images, Stock Photos & Vectors | Shutterstock

  • Get a hand towel and turn on the hot water tap. When hot, fill your sink or bowl with enough hot water to soak your towel. Add your herbs or essential oils.

  • Secure your hair so that it’s off your face and cleanse your face and neck using a gentle exfoliating cleanser.

  • Soak your towel in the hot water and wring it out so that the towel is damp.

  • Lean back in a comfy chair or lie down. Place the towel on your face, holding each corner up so they meet in the center of your forehead.

  • Adjust the towel so that it covers your entire face, including the eyes, leaving just your nose peeking through. Relax for 5 minutes.

To steam with a home facial steamer facial spa steamer mist steam sprayer machine at Banggood

  • Read your facial steamer’s instructions, filling it up as directed. Place it on a table near an outlet so you can plug it in. It will take a few minutes to begin emitting steam.

  • If you’re using essential oils, this is the time to add a few drops to the water. Rosemary (for acne), Lavender (to relax), Chamomile (to reduce inflammation), Menthol (if you have sinus)

  • Secure your hair so that it’s off your face and wash your face using a gentle exfoliating cleanser.

  • Have a seat, get comfortable, and set your face inside the cone attachment, staying 5 to 10 inches away as it says to do in your steamer’s instruction booklet.

  • Steam for 2 or 3 minutes at a time with a 1-minute break in between to see how your skin is handling the steam.

  • Obviously, Facial steamers offer a more powerful steam than the other methods.

How to choose a base

At the end of the day, the base you choose for steaming your face won’t make the steaming any less beneficial, but some bases may offer even more perks.

It comes down to personal preference and budget:

  • Tap water. Tap water is accessible and free, so you can’t really go wrong.

  • Distilled or spring water. You could also use distilled or spring water, though there’s no evidence to suggest that one is actually better than the other for steaming. Though it may be good for a steamer.

  • Beauty teas offer health benefits that are good for you from the inside out, like antioxidants. They’re also supposed to help the body release toxins. Research has found that green tea and others that contain polyphenols have protective and anti-aging benefits when applied topically. So, could or should you use herbal tea as your base for steaming? Absolutely!

How to add herbs and oils

Adding dried herbs and oils to your steam may offer extra benefits. Certain herbs are thought to be more beneficial for different skin types. Some essential oils and herbs are known to have a calming or invigorating effect, depending on what you’re after.


Herbs

  • Chamomile. Research shows that chamomile can help with skin inflammation and dermatitis, making it great for all skin types, including sensitive skin.

  • Rosemary. This fragrant herb may be a good option for those with oily skin.

Oils

  • Lavender. This herb is great for dry skin, and it has relaxing aromatherapy benefits.

  • Geranium. This oil derived from the geranium flower is a natural astringent that tightens and tones the skin.

  • Eucalyptus. If you deal with acne or are congested, this is a great option.

  • Menthol: Another great option for congestion is menthol.

  • Orange: Along with having uplifting aromatherapy properties, orange may also help with blocked pores and a dull complexion.

How hot, how long, and how often?

I have to say, steaming is one of my favourite skincare procedures. I find it enjoyable or therapeutic. And it helps with my clogged pores and sinuses.

So, how often should you steam your faceStudies show you should steam your face once a week; steaming your face too often may damage your skin, lead to breakouts and make your skin dry. If your skin is overly oily and prone to breakouts, you can do a session of 3-4 days of consecutive steaming, but this session should be followed by a 10-day break to allow your skin to recover.

As for the length of each session, steaming your face for 10 minutes at a time should be more than enough.

Remember, a steam burn is more damaging than a burn from boiling water, so you need to be especially careful when steaming your face. To lower your risk of burns, avoid putting your face too close to the steam. Increase the distance as needed for you to be comfortable. Water should be warm, not hot, if you’re using the towel method.

There are two schools of thought regarding “Steaming” as a beauty ritual. One school claiming that it is of no use and even that it could be detrimental stripping the skin of its natural oils or sebum. The other school of thought believes that the skin produces more sebum than it can handle and that clogs the pores. So now it is up to you to take an informed decision on whether or not you want to follow this ritual… as for me… I am off to some steaming on this cold evening!

 
Leave a comment

Posted by on May 16, 2020 in Naturally Better


Pantry Beauty Salon

Pantry Beauty Salon

The kitchen is a warehouse for your beauty needs! Fruits, vegetables, milk, honey, grains, and their powders make for some of the best organic chemical free and effective face packs.  I am listing just a few ways you can cleanse, nourish & brighten your skin while you are cooking! Remember the possibilities are only limited by your imagination. If it is organic and you can eat it, you can probably use it on your skin too!! Your pantry should be your salon!

Tomato And Fuller’s Earth Face Pack 

Multani Mitti Face Packs - Benefits & Top 5 Homemade Recipes ...

Tomato contains lycopene that can protect your skin from UV ray damage Fuller’s Earth or Multani Mitti deep cleanses skin by removing dirt and impurities to keep the skin clean & bright.

What

  • 1 tablespoon Fuller’s Earth or Multani Mitti
  • 2 tablespoons tomato juice

How

  1. Mix the Multani mitti and diluted tomato juice in a bowl until you get a fine paste.
  2. Apply the face pack and let it dry.
  3. Wash it with water
  4. Apply AyurDeva’s Maya Oil. Or any moisturiser of your choice.

When

Twice a week. 

Turmeric, Chickpea Flour, And Milk Face Pack 

Homemade Turmeric Face Mask - Yogamatters Blog

This herbal face pack can fade blemishes by exfoliating your skin and removing dead skin cells. Chickpea Flour and Turmeric work together to reduce tanning and make your skin bright, while the lactic acid in milk keeps it soft.

What

  • 1 tablespoon Chickpea Flour
  • 2 tablespoons milk
  • 1 tsp Honey
  • ½ teaspoon turmeric powder

How

  1. Combine the ingredients in a bowl.
  2. Apply the paste evenly all over your face.
  3. Massage gently and let it dry.
  4. Wash it off.

When

Once a week.


Yogurt And Turmeric Face Pack

Turmeric Face Mask DIY Recipe - 4 Ingredients - The Stripe

This face pack helps to calm your skin, brighten it, and keep your skin healthy and supple.

What

  • 2 tablespoons yogurt
  • ½ teaspoon organic turmeric

How

  1. Mix two tablespoons of yogurt with half a teaspoon of turmeric powder.
  2. Apply the paste to your face. Let it dry.
  3. Wash with water.

When

Two to three times a week.


Mulethi (Licorice) Face Pack

Sandalwood Powder Stock Photos And Images - 123RF

Licorice can reduce sun-induced pigmentation. It contains glabridin, which has anti-inflammatory properties that help reduce pigmentation. 

What

  • 1 teaspoon licorice powder
  • Sandalwood Powder
  • 2 teaspoons coconut milk

How 

  1. Mix a teaspoon of licorice and sandalwood powder with the coconut milk
  2. Apply the paste to your face.
  3. Wash with water once the pack dries.

When

Two to three times a week.


Aloe Vera, Lemon, And Honey Face Pack

Aloe Vera Face Pack with Lemon | HelloGlow.co 
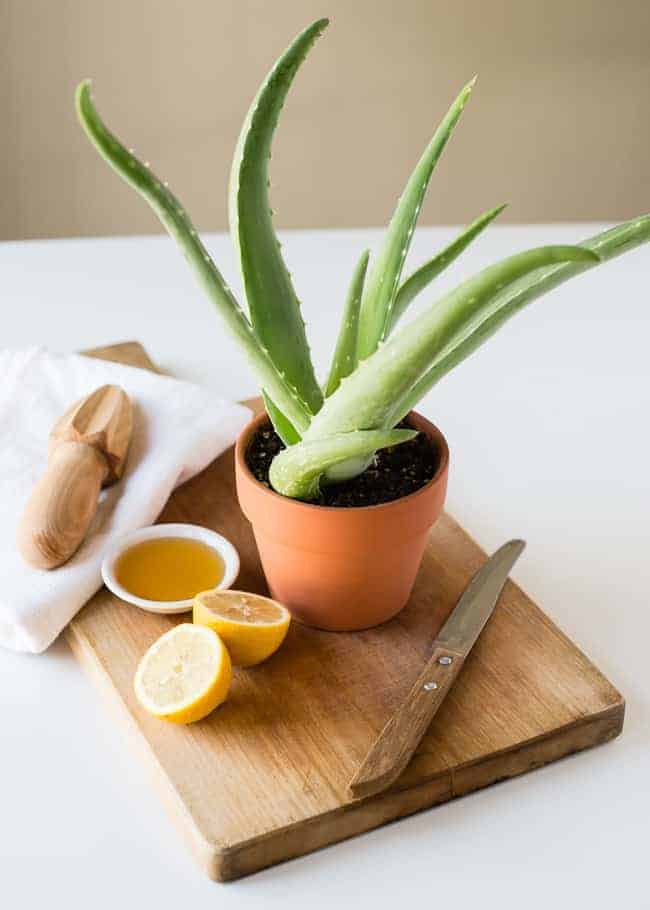
Aloe vera face pack can promote collagen and elastin production by stimulating the fibroblasts in your skin. This improves skin quality and health. Together with lemon and honey, it can brighten the skin and keep it soft.

What

  • 2 tablespoons aloe vera gel
  • ½ teaspoon lemon juice
  • 1 teaspoon honey 

How

  1. Mix the aloe vera gel, lemon juice, and honey in the specified quantities.
  2. Apply the pack to your face. Avoid the eye area.

 When

Two times a week.


Banana Yoghurt and Honey

8 Amazing Fruit Face Packs For Dry Skin | Find Home Remedy ...Bananas are the secret to well moisturized skin. The vitamin A in bananas restores moisture and repairs dry skin.

What

  • Mix 1 banana,
  • 1 teaspoon yoghurt
  • 1 teaspoon honey

How

  1. Mix the banana, yoghurt and honey in the specified quantities.
  2. Apply the pack to your face. Leave for 20 minutes.
  3. Wash and apply AyurDeva Maya Oil or moisturiser of your choice.

When

Two times a week.

Saffron and Milk

12 Homemade Saffron Face Packs For Flawless Skin | 2KnowAndVoteSaffron is gold for skin. It moisturizes the skin, tt works as an antisolar agent, wherein, it absorbs the UV rays and protects the skin from sun damage, its active carotenoids, such as crocetin, exhibit antioxidant and antinociceptive properties that help the skin to maintain optimum health and appear youthful.

What

  • 2-3 strands of Saffron
  • ½ cup milk
  • 1 teaspoon honey
  • 1 teaspoon coconut oil
  • 1 slice bread

How

  1. Soak the saffron in a tsp of milk overnight (the milk will turn yellow)
  2. Add the rest of the milk and honey.
  3. Soak bread in mixture
  4. Apply the pack to your face. Leave the piece of bread under the eye if you have dark circles.
  5. Leave for 20 minutes.
  6. Wash. You will not need any moisturiser as this pack is quite lubricating.

When

Two times a week.

You can use many such pantry items. Wash face with fine sugar, scrub left over Idli batter on your face, rub a banana or papaya peel directly on your face, scrub leftover coffee or tea before you wash your face and oats mixed with some honey and milk are just some ideas. As long as it is clean all this will only help the skin be exfoliated gently and keep it plump and young looking!

So next time you are about to throw out an overripe tomato, think of your face!

Disclaimer

All information provided on this blog is intended for your general knowledge only. Please spot test these face packs before you apply to face. Should you react with redness or swelling, please consult with your doctor or other health care provider.


Leave a comment

Posted by on May 13, 2020 in Naturally Better


ImmuniTea


As we come into winter down under and with the dreaded Corona Virus at our tail, we need to keep our immunity up. I am sure we have all had out Flu vaccine by now. Many of us are probably having Vitamin C tablets to boost immunity. Nothing wrong with that. However my choice is the more natural one.

The natural option involves having a fresh organic tea made every morning with fresh ingrdients. It is best to have this on an empty stomach.  This ginger and turmeric immune boosting tea recipe is the best way to stay healthy during the cold winter months and help fight off a cold or flu.7 ingredients, 7 minutes and its 7th heaven for the body. Here is what each ingredient will do

IMG_0699.jpeg

  • The turmeric is anti-inflammatory, antibacterial and antiviral. This, combined with the anti-inflammatory effects of ginger, means that both are wonderful for treating the congestion associated with respiratory infections.
  • Though the Curcumin is very beneficial for the body, it doesn’t get absorbed easily. Piperine in pepper is what helps absorb the curcumin. So a combination of the two spices is potent and helps fight body against diseases like flu, coghs and cods.
  • Cinnamon is a magical herb that is a high source of antioxidants, has anti-inflammatory properties, helps in Blood glucose management, protects heart health, helps boost brain function and fights infections by boosting the immune system.
  • Ghee: Another way to increase the bioavailability of turmeric is to consume this spice with a source of fat.  Ghee will help curcumin to be directly absorbed into the blood stream and bypass the liver.
  • Lemon obviously donates a little hit of vitamin C. But it is the zest that impresses the most. Lemon zest is nutrient dense, an amazing antioxidant and is very anti-bacterial too. It is also very good for stimulating digestion and breaking down mucous. Whereever a recipe calls for lemon juice, always incorporate the zest too.
  • Honey has been used for centuries to reduce inflammation, promote healing and reduce infection. But not all honey is created equal. Processed honey has no medicinal qualities. Real, raw honey possesses these properties, with some types of honey more potent than others. Manuka honey is a type of honey which is potently antibiotic and is receiving much attention in the medical community for its medicinal qualities. It or another raw medicinal honey would be your best choice here.

So how is this tea made, you ask. Well there are two ways

INGREDIENTS

  • 1 inch piece of ginger grated, skin on
  • 1 inch piece of turmeric root grated, skin on
  • 1 crack of black pepper
  • Pinch of Cinnamon Powder
  • 1 teaspoon homemade organic Ghee or cold pressed coconut oil
  • 2 cups of water
  • The yellow peel and juice of 1/2 lemon
  • 1/2 tsp Manuka Honey (optional)

INSTRUCTIONS (First method)

Ginger-Turmeric Tea – Kevin Lee Jacobs

  1. Bring the water, lemon peel (peel with a veggie peeler), ginger, turmeric, cinnamon and black pepper to a bare simmer.
  2. Turn the heat down to low, cook for 7 minutes. You don’t want the pot to bubble or boil, it’s harmful to the nutrients in the turmeric.
  3. Take off the heat
  4. Squeeze in the lemon juice.
  5. Stir in the Ghee and add 1 teaspoon of honey.
  6. If using raw honey, wait for the tea to cool down a few minutes so the heat doesn’t destroy some of it’s nutrients.

INSTRUCTIONS (Second method)

The Best Cast Iron Teapot - Yum Of China


If you are really short of time and don’t have any time to brew, simply

  1. Place grated Ginger, grated fresh Turmeric and Lemon peel in a cast iron teapot
  2. Add a crack of pepper and cinnamon
  3. Pour boilng hot water into the pot
  4. Allow to sit for a few minutes.
  5. Now add the ghee, lemon juice and honey and enjoy it warm.

A warm cuppa ImmuniTea will keep you well this winter. But like with everything else in Ayurveda, consistency is the key.

 
3 Comments

Posted by on April 23, 2020 in Naturally Better


Gandusha – Oil Pulling


Oil pulling is good for oral care?

The world of hygeine and wellness is forever evolving and keeping up with the latest trends can be pretty onerous—especially when you have to sort fact from fiction and determine which new product or practice is actually worth the hype.

Admittedly, I was a little sceptical of oil pulling when my mother-in-law introduced me to it, many years ago. She was never able to tell me “WHY” and I refused to follow a practice without enough proof that it works. But after extensive research—and having tried it out for myself—I can confirm that oil pulling is an easy and inexpensive way to rebalance the oral microbiome and improve oral and dental health.

The History of Oil Pulling

Essentially, oil pulling involves swishing oil in the mouth for a prolonged period of time (typically 20 minutes, although I say 5-10 is plenty!). And despite its modern resurgence, this practice has been around for thousands of years.

Ancient Ayurvedic medicine prescribed oil pulling for, well… everything. The Journal of Ayurveda and Integrative Medicine, Ayurvedic practitioners claim oil pulling can cure 30 different diseases, including many illnesses that have nothing to do with the mouth.

While I am a firm believer in the mouth-body connection and the fact that what happens in the mouth happens in the body, I am still sceptical about oil pulling being viewed as a total-body cure-all.

That said, there are plenty of proven oil pulling benefits that make this practice worth the effort.

Although oil pulling has been around for the last 3,000 years or so, it became a major trend in the 1990s after a Russian physician, Dr. F. Karach, wrote about its health-boosting potential.

While not extensive, a fair amount of research on oil pulling has been conducted and published over the last couple of decades in multiple journals. University of Oxford scientists (and I quote them simply because they are OXFORD!!) conclude that oil pulling is cost-effective and free from major dangers and that it “may have beneficial effects on dental hygiene.”

So lets look at Oil pulling, the how tos, what not tos and everything else about it. I have put many links if you are a sceptic like me, to see what research has been done.

How to Oil Pull

Gandhusha or Oil pulling is one of the easiest practices you can learn to improve and maintain oral health. In fact, learning how to oil pull is probably easier than learning how to brush your teeth the right way.

To start, place a tablespoon of oil in your mouth. Then, sit upright and swish the oil around for ideally 5-10 minutes. If you find yourself swallowing it then its probably too much, reduce it to a teaspoon.

Finally, spit it out into a trash can, not a toilet or sink (the oil can clog pipes as it hardens).

Some sources say that brushing after you oil pull is best. I disagree, and recommend brushing before oil pulling.

The biofilm on your teeth (oral microbiome) needs to be reconditioned each day to retain healthy colonies of good bacteria, and rebalancing the oral microbiome is one of the key benefits of oil pulling. If you brush after you pull, you’ll actually get rid of the good bacteria you just worked to support.

After you pull oil though, you can rinse your mouth out with warm water and add some salt for that extra clean feel. I prefer to not eat or drink anything for about half an hour after I pull oil.

Personally, I try to oil pull for around five to seven minutes, two to three times a week. I’ll do it more if I’m concerned about inflammation of the gums. (Some days it’s just not possible—but l do have a fun recipe at the end of this article that makes oil pulling much more fun and convenient.)

The Best Oil for Oil Pulling

Sesame was (and is) the oil of choice for Ayurvedic practitioners. However, I strongly recommend coconut oil for oil pulling.

First, coconut oil is an antioxidant and anti-inflammatory powerhouse, which makes it ideal for reducing inflammation and oxidation in the mouth.

Coconut oil also contains lauric acid, a medium-chain triglyceride (MCT) that is incredibly effective at killing the bad bacteria that can lead to tooth decay. These same compounds may also decrease the amount of plaque that builds up on your teeth, in turn reducing your chance for gum disease. A prospective comparative interventional study on comparing the effect of coconut oil over sesame oil in plaque-induced gingivitis proposed that the alkalis in the saliva react with oil resulting in saponification and formation of soap-like substance which reduces the adhesion of plaque. Hence, the lauric acid in the coconut oil may react with salivary sodium hydroxide forming sodium laureate, the main constituent of soap which might be responsible for the cleansing action and decreased plaque accumulation. (Sounds pretty good)

Please remember that Oil pulling can’t replace brushing and flossing. Oil pulling definitely helps to reduce plaque and cavity-causing bacteria, but it is only one part of a good dental health routine.

Don’t stop flossing, brushing, or tongue scraping—these are all necessary for preventing and reversing cavities, preventing gum disease, and reducing your risk of other oral health problems.

Top 3 Oil Pulling Benefits

There’s a lot of misinformation about what oil pulling can and cannot do for oral and overall health. So if you want to know what the science says about oil pulling benefits, read on…

Beats Bad Breath

If you struggle with bad breath or “halitosis,” you’ve probably relied on mouthwash to correct the condition. But as it turns out, that may not be the best solution.

What you probably don’t know is that the alcohol in mouthwash dries out the inside of your mouth, which, in turn, reduces the amount of saliva you can produce. This alters the oral pH which is necessary to keep certain good bacteria alive.

In short, mouthwash is a band aid solution to bad breath. What’s worse is that its continued use can actually prolong the issue you’re trying to resolve (hmmm sound like a sales gimmick for these mouthwash companies, right?)

That brings us to oil pulling.

Unlike mouthwash, oil pulling is able to support your saliva’s efforts in disorganizing bacteria without killing the good bacteria and drying your mouth out.

But remember, effects of oil-pulling may only seem to occur after at least three weeks, —just one reason why coconut oil pulling should be used as a long-term dental health solution, not a quick fix.

Could Help Remineralize Teeth

The human body is an amazing piece of work. Given the right stimulus it heals itself almost all of the time. Yep and believe it or not, some cavities can be reversed naturally.

Your teeth are designed to rebuild themselves on an ongoing basis, but remineralization is only possible in the presence of the proper nutrients and the absence of cavity-causing bacteria.

While diet is key to this reversal process, coconut oil pulling might also play a useful part. The process helps to correct bacterial dysbiosis in the mouth, ensuring that the bad bacteria that causes tooth decay is eliminated, while positive bacteria is allowed to thrive.

Kills Cavity-Causing Bacteria

As mentioned earlier, overgrowth of certain harmful bacteria in your mouth, such as Streptococcus mutans (S. mutans), can lead to cavities, or “dental caries.”

The good news? Oil pulling with both sesame and coconut oils gets rid of excessive S. mutans within the mouth just as effectively as the chlorhexidine found in conventional mouthwash.

Oil pulling also carries a bonus benefit that mouthwash does not: oil pulling kills harmful bacteria that can cause cavities without also drastically reducing the good bacteria your mouth needs to stay healthy.

How to Oil Pull

After brushing and flossing, gently swish, pull, and suck the oil through your teeth; the chews will quickly melt in your mouth once you begin. Go slow and don’t work too hard, pulling for about 1-3 minutes.

– Don’t swallow the oil. Try using less if the urge to swallow is too great.

– When finished pulling, don’t spit the oil in the sink or toilet. (It can clog pipes as it solidifies.) Instead, discard the used oil in the trash.

– Optional: Place a plastic bag in the trash can and half fill a trash can with a mixture of baking soda and sand. Spit the oil into this and dispose off the trash as often you can.

– Optional: Rinse your mouth with warm water after pulling.

Final Thoughts on Oil Pulling

I started out as an oil pulling sceptic—probably like many of you. However, the research and my own experiences prove that oil pulling is a useful part of a good oral health routine.

As anything in Ayurveda, a little goes a long way. A few times a week, a few minutes a day keeps your dental health at its optimum. Remember, no matter how sophisticated dental techniques have become, preventive dentistry still remains the foundation for oral health.

Not only can oil pulling reduce plaque and bacteria that cause tooth decay and gum disease, but it may also be responsible for beating bad breath.

My preferred oil for pulling is coconut oil, due to its anti-inflammatory and antioxidative properties. Try pulling for 5-8 minutes a day if you can.

And if you’re interested in trying oil pulling but often in a hurry, my coconut oil pulling chews are an easy way to make this beneficial practice a part of your regular routine.


Coconut Oil Chews: The Convenient, Mess-Free Way to Oil Pull

Remineralizing Coconut Oil Pulling Chews

If you’re like me, your schedule is jam-packed and finding the time to swish oil in your mouth is difficult at best. Well, I have good news! My recipe for oil pulling chews makes keeping up with your oil pulling routine easier than ever.

While developing these recipes, I was also able to add in a few additional ingredients that promote healthy flora within the mouth. Whether you’re focusing on remineralizing or boosting the microbiome of your health, I’m confident you’ll enjoy these options for a more convenient way to oil pull.

Remember, if you can’t be bothered with either, simply use plain and pure organic Coconut Oil or Sesame Oil for it. These recipes just make it fun!

Microbiome Coconut Oil Pulling Chews

Even if you already take a daily probiotic, I highly recommend adding the spore-based probiotics to this recipe. Swishing them in your mouth for 5-10 minutes will give them time to fight bad bacteria in the mouth and rebalance the oral microbiome—which is critically important for fighting bad breath and preventing gum disease, cavities, and a host of other issues.

  • Prep Time:10 minutes
  • Cook Time:5 minutes
  • Yield: Makes 36 one teaspoon portions

Ingredients

  • ¼ cup Cold-pressed Organic Coconut Oil 
  • ¼ cup Avocado Oil
  • ¼ cup Aloe Vera Gel powder
  • 2 crushed Hyperbiotics Oral Probiotics capsules (optional)
  • 10 drops each Spearmint and Clove Essential oils
  • Mini Ice Tray
  • Glass Jar

Instructions

  1. In a double boiler mix coconut oil and avocado oil.
  2. Whisk in Aloe Vera Gel powder and oral probiotics (if used) until dissolved.
  3. Fill ice cube trays in 1 teaspoon portions in silicone or BPA-free ice cube trays
  4. Freeze overnight or until completely hardened.
  5. Transfer to a jar and store in the fridge. Use one each morning for oil pulling first thing in the morning, before eating or drinking anything.


Remineralizing Coconut Oil Pulling Chews Recipe

These chews are particurly good if you are drinking something acidic like coffee or wine to help prevent staining. If you struggle with coffee breath, pulling for 5-10 minutes can minimize coffee odors—no brushing required!

  • Prep Time:5 minutes
  • Cook Time:2 hours 10 minutes
  • Yield: 36 one teaspoon portions

Ingredients

  • ½ cup Cold-pressed Organic Coconut Oil (gently warm to a liquid if necessary)
  • ¼ cup Organic Avocado Oil
  • 1 tablespoon Baking Soda
  • 10 drops each Cinnamon & Peppermint Oil
  • Glass Jar (with lid for storage in the fridge)

Instructions

  1. Mix coconut oil with avocado oil in a double boiler, set aside.
  2. Slowly add the baking powder into the oil, mixing with a fork till it dissolves completely.
  3. Fill ice cube trays in 1/2 teaspoon portions, mix often as you fill the tray to prevent powders from settling to the bottom of the bowl.
  4. Freeze overnight or at least 2 hours, until completely hardened.
  5. Transfer the chews to a jar and store in the fridge.


Notes

After brushing and flossing, gently swish, pull and suck the oil through your teeth, the chews will quickly melt in your mouth as you begin. Start slow and don’t work too hard, pulling for about 1-3 minutes at a time.

Don’t swallow the oil.

If the urge to swallow is too great, try cutting the chew into half to use less.

Pro-tip: Discard the used oil out in the trash! Discarding in the sink or toilet can clog plumbing. Rinse your mouth with warm water.

 
Leave a comment

Posted by on April 13, 2020 in Naturally Better


To Ghee or not to Ghee


Speaking of an Ayurvedic lifestyle the first thing that comes to mind is Ghee, popularly known as “clarified butter”. The humble ghee has been a staple of both Indian cuisine and Ayurvedic medicine since ancient times. Today, professional health food chefs have discovered its rich, nutty flavour along with its many health benefits!

Image result for ghee images

Though Ghee is sometimes referred to as clarified butter, it actually goes a step beyond. Clarified butter is made by heating unsalted butter until the milk solids and water rise to the top, where they are skimmed off. But in case of Ghee, we cook the butter longer till the milk solids brown and we then strain out all the milk solids and water (which kids love to devour with sugar!), leaving pure fat behind.

In traditional homes it is flavoured by adding Curry, Tulsi or Betel leaves after the ghee is ready. Whether it’s plain or flavoured with herbs, ghee can be used in nearly every preparation. Since it has a high burning point, it is extremely healthy to use in stir-frying and sautéing instead of oils. In addition to its tasty flavour and versatility, here are some of the surprising benefits you can enjoy from cooking with ghee.

Why Ghee? Because….

  • Ghee is all-natural. Ghee is free of potentially unhealthy additives, preservatives and trans-fats. Thanks to its pure form and low moisture content, ghee is shelf-stable and can stay fresh for up to a year without refrigeration. In fact, in India, some have aged ghee that has lasted more than 100 years. I am not sure how good it bad that is, though.
  • Ghee is a rich source of antioxidants. Antioxidants act as “scavengers” in the body, seeking out and neutralizing free radicals to prevent cell and tissue damage that can lead to disease. Ghee contains vitamin E, one of the most powerful antioxidants found in food.
  • Ghee helps moisturize dry skin and hair. Ghee isn’t used just for cooking. It has long been used by Indian women as a topical moisturizer to relieve dry complexions. Ayurdeva’s Shatha Dhautha Ghrita is one such application rich in Vitamin E and A which helps to keep skin moisturised and naturally younger looking. Its also great for the scalp and helps fight dandruff & dryness and reduces hairfall and encourages the growth of thick, lustrous hair. Nothing holds the curls better than a dash of AyurDeva’s Shatha Dhautha Ghritha.
  • Ghee has anti-inflammatory properties. Ayurvedic medicine has regularly used ghee to treat burns and swelling. Ghee is strengthening and removes toxins from our system. It contains large quantities of butyrate, a fatty acid in combination with vitamins A, D, E, and K which aids in boosting immunity, promote gut health, keep your hair and skin healthy, lubricate joints and strengthen bones. The substance also has anti-viral properties and a little everyday can keep dreadful viruses away.
  • Ghee contains heart-healthy fats. While ghee has a high concentration of fat, it’s high in monounsaturated Omega-3s. These are the same fatty acids found in foods like salmon that have been discovered to promote a healthy heart and cardiovascular system.
  • Ghee is a viable alternative for individuals with dairy allergies. Since ghee is formed by removing milk solids, it contains only trace amounts of milk sugars (lactose) and proteins (casein), making it suitable for most people with dairy allergies. Ghee also fits into the popular Paleo diet, which is based on the types of foods eaten by early humans and excludes dairy products.
  • Ghee aids digestion. Ghee is believed to assist with digestion by allowing food to be broken down more efficiently, by stimulating digestive enzymes.
  • Ghee is a nutritional powerhouse. Ghee contains plentiful amounts of fat-soluble vitamins A, D, E and K. These nutrients are essential to a wide range of body functions from the brain to the immune system. In addition, ghee aids in the body’s absorption of fat-soluble vitamins and minerals from other foods.

How to eat Ghee….

Just one teaspoonful each day can help boost your immune system, keep your mind alert, digestive system clean, eyes clear, skin younger looking and hair healthy! Here are some ways you can incorporate ghee in your daily practices.

  • A couple of drops of warm cow’s ghee in each nostril as part of Nasya, improves immune system of upper respiratory tract and prevents allergies of dust, smoke and aerosols. It can also protect from recurrent infections of throat, nose and chest.
  • Consuming 1-2 teaspoon of homemade cow’s ghee every morning on empty stomach will help to prevent thickening of arteries and improve blood circulation as well as reduce accumulation of free radicals in body cells.
  • A little ghee on top of rotis & rice helps to improve the digestion process, absorption of nutrients from food, lubricate large intestines and prevent constipation.
  • Melted ghee instead of butter to top popcorn or sautéed veggies.
  • Blend into a healthy smoothie.
  • Use in your favourite casserole or rice dish instead of Oil.
  • Mix with herbs and seasonings and use as a rub for chicken..
  • Drizzle over fish or seafood, such as scallops.
  • Spread on sourdough bread or naan.
  • Mix into hot maple syrup and serve over your favourite French Toast or pancake.


So, with so many benefits and so many easy ways to incorporate it, make a teaspoonful of ghee the new apple a day!


Leave a comment

Posted by on March 21, 2020 in Naturally Better


Incredible Jindal

Incredible Jindal

I have never been on a holiday (definitely not a retreat) alone. Needless to say, I was full of apprehension when I signed up for a couple of weeks at Jindal Naturecure Institute, a retreat in the outskirts of Bangalore.

Jindal 4

Having led a fast paced and being rather spoilt with clean unpolluted air in Sydney, I wasn’t sure I could cope with two weeks in the back of beyond. But I had decided that I was going to make full use of the time to revive, rejuvenate and come back refreshed as the two-week stay didn’t come cheap.

Jindal 2

As I entered the gate, I was greeted by a large fountain behind which was an ominous building. To the left and right were manicured gardens with brightly coloured flower patches laced with pathways. I had no idea what I had to do next! Suddenly, I was greeted by a perfectly dressed guard. In a polite manner he allayed my fears that in a couple of days, I will know the place well. He then announced my arrival and a neat Golf cart came to the main gate to pick me and my stuff up. The driver politely showed me around as we wove our way to the admin office called the Green Plaza.

Whilst I completed my paperwork and waited to meet the doctor assigned to me, my luggage was neatly placed in the room allocated to me. An in-depth analysis was done of my body weight, BMI, water content, Visceral Fat and the doctor announced (much to my dismay) that I had to lose 15 kilos to be in optimum health! He said without setting a target, we would try to knock off as many kilos as we could. The idea, he explained to me, was that naturally and through discipline, patience, self-awareness, they would gradually restore one’s health sustainably and without side effects!

So, I surrendered myself to his treatment and to mother nature. I found out, as days went by, that the beauty of this place is that it is a charitable hospital, not a luxurious spa. Courteous people, competent doctors, time bound services, many activities, lectures, and entertainment made the stay most enjoyable! Massages and treatments (esp colon hydrotherapy), juices, fruits and vegetables are administered as medicine yet with a view to keep it sustainable for when you go back! There are acupuncture and physiotherapy treatments prescribed to people who need them. This was my first time with acupuncture as well. It was not painful, contrary to how terrifying it looks. It is easier on the skin than taking a regular injection. But the result on my Plantar Fasciitis was magical!

Jindal 5

The idea is to get you to a base point from where your health can only look upwards…. And weight loss is just a side effect! Win:Win!

Toward this goal one is expected to follow a rigorous, yet relaxing routine. In the next 15 days I found out exactly how. Here’s how a typical day in my life in Jindal looked like

  • 5:15 am 45 mins compulsory brisk walk
  • 6:00 am 15 mins Yoga kriya (Nasya, Jalneti, Vaman Dhauti, Kunjal Kriya, Gargling, Eye Wash with Triphala, steam inhalation)
  • 6:15 am 10 mins Hasya Yoga Open Laughter Session
  • 6:30 am Yoga and Surya Namaskar
  • 7:00 am 45 mins Pranayama session
  • 7:45 am Morning juices (as prescribed by your treating doctor) and socialising
  • 8:15 am 10 mins Mud packs for eyes and kidneys
  • 9:00 am to 11:00 am A pick of the many wonderful massages, steam/sauna bath and other water treatments as prescribed by your treating doctor
  • 9:20 am Second fresh Juice of the day
  • 11:15 to 12:15 Lunch which could comprise of 1 or 2 fruits and soup or just two glasses of freshly squeezed orange juice, as agreed by you and your doctor.
  • Post lunch was free time. Some people choose to go to Gym, I was too busy catching up with my sleep.
  • 2:00 pm, time for another Juice.
  • 3:00 to 3:30 pm disease specific yoga training
  • 3:30 pm time for 5th Juice of the day
  • 4:30 pm – 5:00pm Swim Yoga or outdoor gym
  • 5:15 pm to 6:15 pm a couple of rounds of the estate (I put an average of 20K steps on pedometer everyday)
  • 6:15 pm – 7:15pm Dinner time, socializing and fun.
  • Post dinner, time for some more walks gazing at the stars, back to our lobby (the sky never looked so beautiful before) and chatting with friends
  • 7:30 pm Socializing time. Usually we used to have music sessions or dumb charades. For the less daring there were lectures by guest speakers.
  • 8:15 pm Tying a wet towel around the stomach. I got some Epsom Salt feet soak, which was just divine!
  • 8:30 pm 9:30 pm Time for some more socializing, music, fun and laughter.
  • 10:00 pm time for Yoganidra in Hindi through the PA system in the room. And sleep.

Yep, a super busy schedule, but it was so much fun. The first two days are hard! But they have taken the pain out of remembering. A whole schedule for the next day is pinned to your door, so you are never late for anything. And if you forget what juice you have to have for  food or treatment, just rock up and they will tell you what you are due for! Brilliant!

After 15 days, I had lost 6 kgs. (4.1Kg fat, 0.9Kg water and 1Kg muscle). My Visceral Fat came down from 18 to 9! I came away looking 5-6 years younger. To say the least, I was thrilled with the results.

But the trick is in keeping it off! This is what I plan to do when I get back home

  • Daily
    • 2-4 Glasses of water soon after waking up
    • Yoga Kriya (washing of eyes, nose and throat)
    • 30 mins Jog/Spin/Swim/Yoga/Surya Namaskar & Pranayam in the morning
    • Throughout the day, try to drink at least 12 glasses (3 lt.) of water (teas and juices above that)
    • Try to eat more raw food (fruits and vegetables with their skins)
    • Keep a gap of 3 hrs between dinner and sleep
    • Reduce my intake of salt, sugar and processed wheat flour (3 white killers)
  • Weekly
    • Fast two whole day on liquid diet
    • Vamana Dhauti (forceful vomiting) (Something I will never do this)
    • Full body and hair Oil Massage + Steam Bath

jindal 1

My aim is to come back next year having lost another 5 kilos following this regime and lose another 6! From weight loss as a goal I now aim to have my metabolic age lower than my actual age!

This is the added benefit. There has been a quantum shift in my attitude towards health and fitness. I love the way I feel and the camera loves the way I look!

Jindal is by far the best thing I have done for myself! I would have no hesitation in recommending it to anyone!

You Go Jindal!!!

 
Leave a comment

Posted by on September 25, 2019 in Fascinating, Naturally Better


Homemade Facial Spritzers


On a hot summer’s day, refresh yourself with a homemade spritzer! It’s wonderful for your skin and refreshing. Made at home, you know what’s been in the spritzer, you can change the combination to suit your own olfactory needs! It barely takes a few minutes to make and keeps well refrigerated. You should be able to find all the ingredients at your the local market or pharmacy. will be perfect for finding your supplies.

You will need:

  • A small spray bottle.
  • Distilled/Bottled water or witch hazel solution.
  • A filter (coffee filter works fine) and
  • Funnel to pour your homemade facial spritzer into the spray-bottle.NOTE: Always use clean, sterile equipment when preparing homemade cosmetics. Always test on your wrist before spraying the facial spritzer on your face or all over your body. If any reaction occurs, discontinue use immediately.

Rose And Rosemary Water

  • 6 tbsp fresh rosemary
  • 2 tbsp fresh rose petals
  • 4 cups water
  • 1 tsp Vitamin E oil

Bring the water JUST to a simmer and turn off heat. Add herbs/flowers. Cover and steep for 20 mins. This process can be repeated using the same water and more herbs/flowers for a stronger scent. Add a vitamin ‘E’ oil while mixture is still warm. Cool to room temperature, then strain out the herbs. Put liquid in a bottle with a lid and leave in fridge. Dab on with cotton or put in spray bottle and spray on your face and body as needed. This rinse is particularly good to remove any traces of soap on your face as well. Refrigerate between uses.

This concoction balances, purifies and tones the skin, giving it a cooling sensation. It helps to maintain moisture balance of facial skin and not to forget it smells heavenly!  You can use most any flower or herb of your choice. Try Lavender, Lemon Verbana, Witch Hazel, Marigold for an entirely different experience.

Refreshing Cucumber Spritz
This is a refreshing spritz – ideal for use in a hot climate for all skin types. It quickly rejuvenates the skin and soothes the burning sensation from the sun.

  • Small cucumber
  • 1 Cup of distilled water
  • Glycerin

Cut the skin off cucumber and chop roughly. Mix the cucumber with the distilled water and glycerin. Strain mixture through a fine sieve into funnel and pour into your spritzer bottle. Add more water if needed to dilute mixture. Use liberally for a cool, refreshing effect. Store in refrigerator.

Minty Facial Spritzer
This refreshing spritzer is ideally suited to oily or acne prone skin. It is NOT suitable for sensitive skin.

  • 1 teaspoon apple cider vinegar
  • 25 ml distilled water.
  • 1 drop of pure organic peppermint essential oil OR Lipton Peppermint tea.Put 1 teaspoon of apple cider vinegar into small spray bottle. Add 1 drop of pure organic peppermint essential oil. Top up with distilled water.
    Alternative:
    Make a cup of Peppermint tea and add to apple cider vinegar and water mixture.
    Shake well before each use. Keep refrigerated and use within 3 days.
    Caution: Avoid contact with eyes as it contains Peppermint essential oil.

You can use these facial sprays a couple of times during the day when your face needs attention and moisture. You will instantly feel refreshed, energized and cool. The essential oils give a soothing aroma that lingers on for quite some time. The best part is that is very easy to make and store. The ingredients used are readily available and do not harm your skin in any way as they are all natural. A single batch can be used for 15 days and should be stored in a refrigerator for maximum amount of time. When you are on the go, take it out of refrigerator and you are good to go with a spray on which will rejuvenate your skin instantly. You can also use it for spraying on cotton pads and using as eye patches to relax your eyes. This will be good for your dark circles as well.  Since it is so easy to make, you can make it once a week and store for the entire week. Trust me, once you spray it on, you will realize how simple ingredients can give your skin that much needed boost of hydration during summers. So, go ahead ladies, spray on and rejuvenate your senses this summer!

 
Leave a comment

Posted by on August 1, 2013 in Naturally Better


Tags: , , , , ,

 
Women in Bollywood

A journey through heroine-oriented cinema