RSS

Category Archives: Contemporary

A faster way to bake. Introducing, crunchy into healthy!

Compound Butters


Recently I discovered that herb butters are also called compound butters. I guess it is the fact that it has many ingredients in it. I have been experimenting with many herbs and I love these butters!

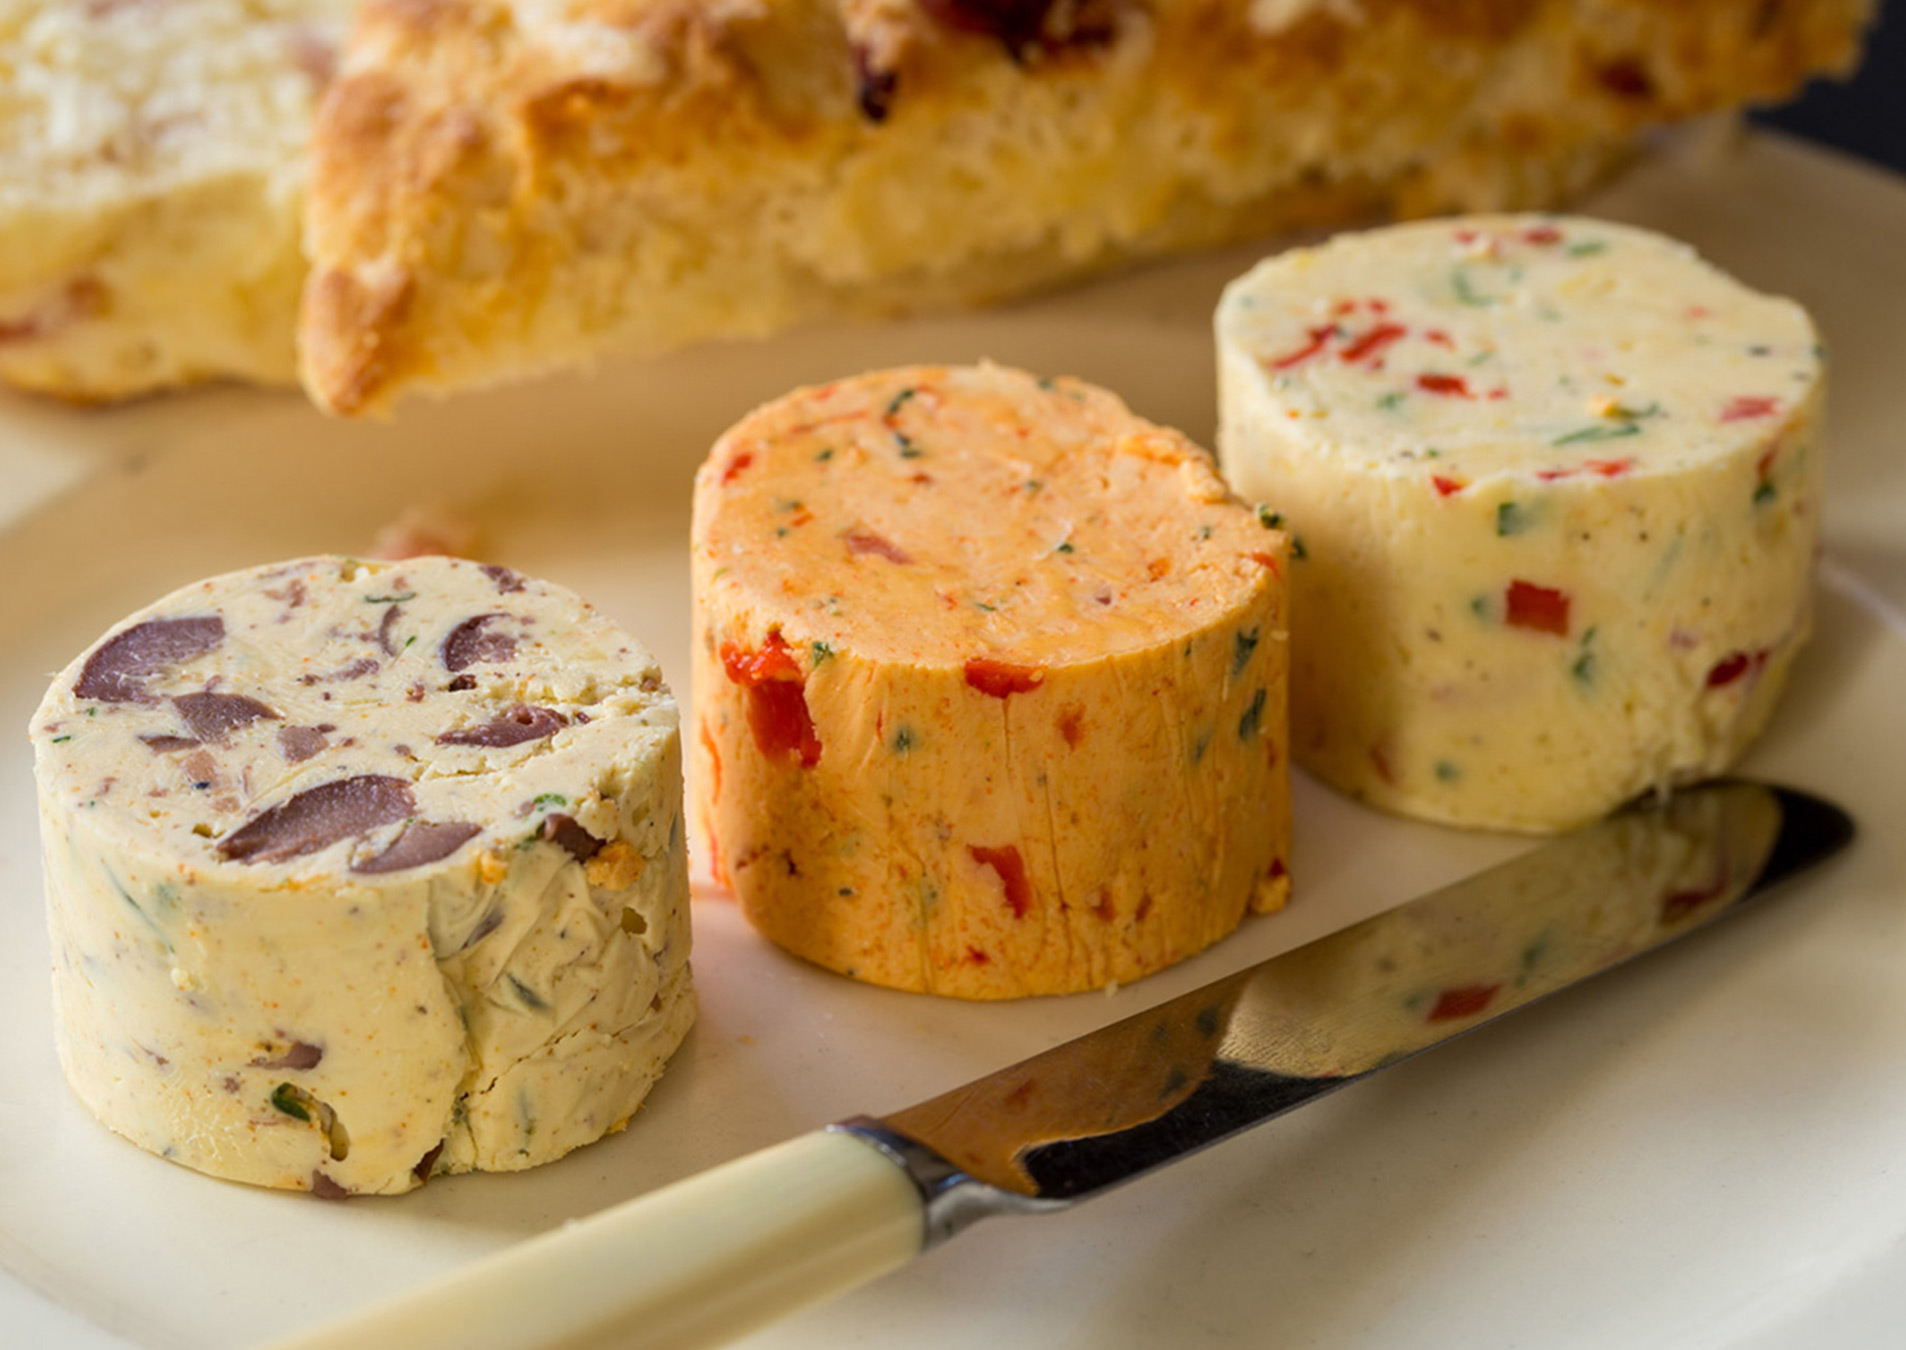
These butters are bursting with flavour and change a bland meal into something special. They are colourful and make dressing up lamb, or covering a toast simple, tasty and gorgeous. They can be stored in your freezer forever or in the fridge for up to 3 weeks.

I use homemade butter, but store bought is just as good (and may have a longer shelf life). I use fresh herbs. It gives the butter a smooth feel. If using dried herbs, just heat a littler butter and fry the herbs for best results and may result in longer shelf life.

Here are some of my favourites!

Image result for garlic and parsley butter image

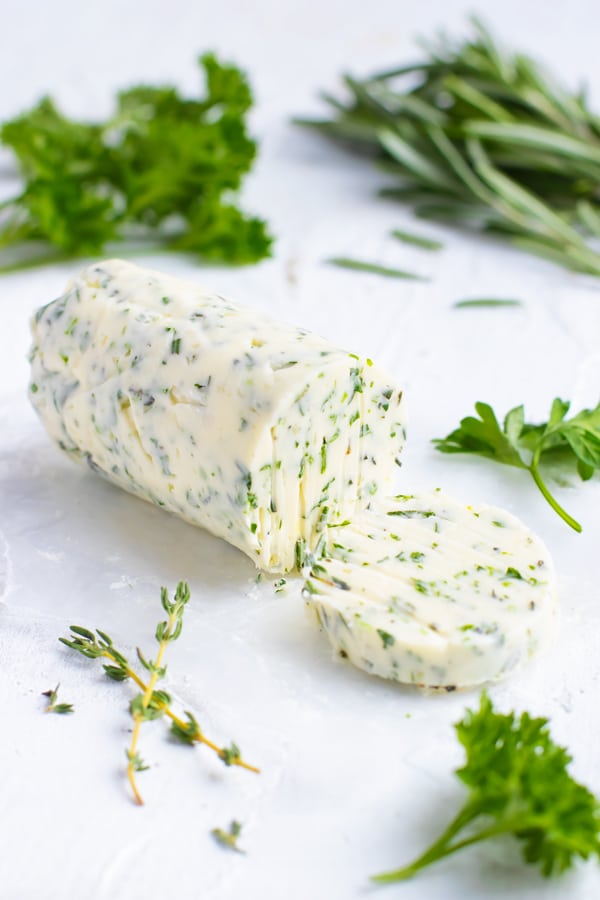
CHIVE, GARLIC AND PARSLEY BUTTER

Ingredients

  1. 250g block butter
  2. 1/4 cup fresh chives, chopped
  3. 1/4 cup fresh parsley leaves, chopped
  4. 1 clove garlic, crushed
  5. Salt to season

Method

  • Chop butter, then in a bowl season with chives, parsley, garlic and salt. Mash to combine
  • Tip butter onto a piece of baking paper, roll tightly into a log shape then twist the ends
  • Freeze until firm

Suggested uses

Melt onto meat, fish or veggies. Spread on toast, parathas, omelettes

Image result for garlic and truffle butter image

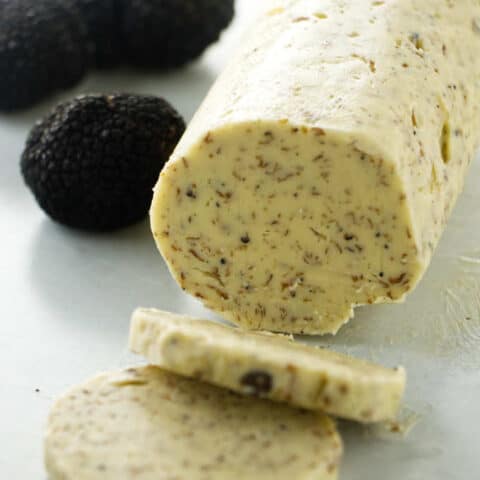
TRUFFLE & GARLIC BUTTER

Ingredients

  1. 250g block butter
  2. 2 tablespoons of Truffle, grated
  3. 1 clove garlic, crushed
  4. Salt to season

Method

  • Chop butter, then in a bowl season with truffle, garlic and salt. Mash to combine
  • Tip butter onto a piece of baking paper, roll tightly into a log shape then twist the ends
  • Freeze until firm

Suggested uses

  • On a toasted baguette. Just slather it on and enjoy.
  • Added to a piping hot steak, grilled chicken or pan seared pork chops. Plop a dollop right on top.
  • Mixed with mashed potatoes.
  • Added to cooked Basmati rice.
  • As a sauce for fresh pasta or meat stuffed ravioli.
  • Melted and drizzled over popcorn.
  • Use to airfry French fries.
Image result for sriracha and honey butter

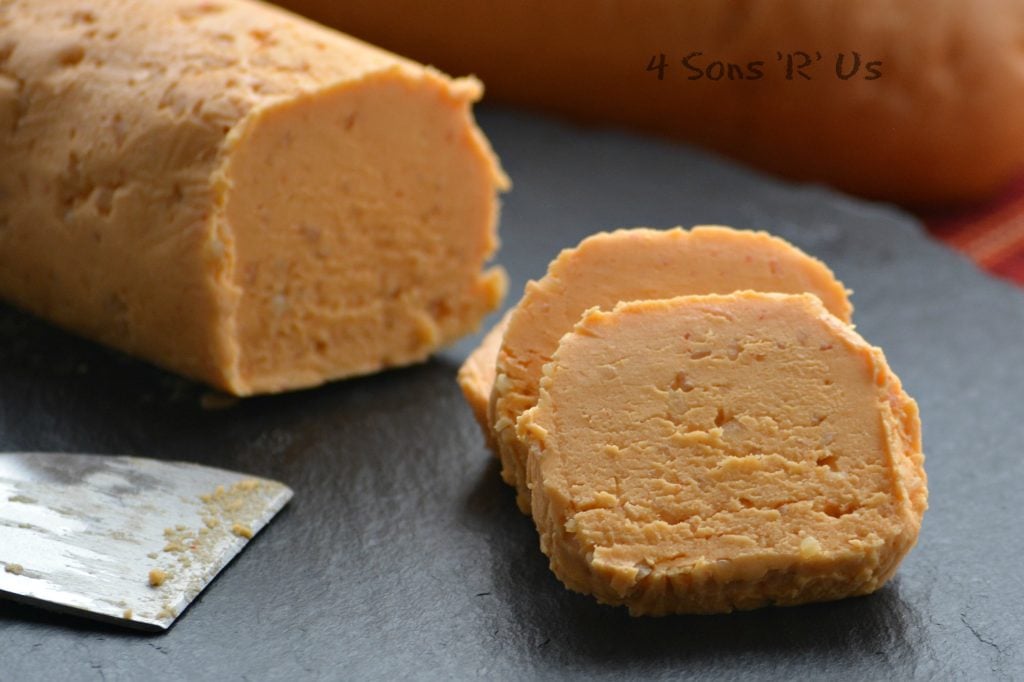
SRIRACHA & HONEY BUTTER

Ingredients

  1. 2 sticks unsalted butter, at room temperature
  2. 2 tablespoons honey
  3. 5 – 7 teaspoons Sriracha or to taste
  4. 5 cloves garlic, minced
  5. 1/4 teaspoon salt or to taste

Method

  • Chop butter, then in a bowl season with honey, garlic, Sriracha and salt. Mash to combine
  • Tip butter onto a piece of baking paper, roll tightly into a log shape then twist the ends
  • This butter is of a runny consistency.

Suggested uses

Pour onto meat, fish or veggies. Spread on toast or crumpets or sourdough bread

Image result for Dill & lemon butter

DILL AND LEMON BUTTER

Ingredients

  1. 250g block butter
  2. 1/3 cup dill, chopped
  3. Rind of 1 lemon
  4. Salt to season

Method

  • Chop butter, then in a bowl season with dill, lemon rind and salt. Mash to combine
  • Tip butter onto a piece of baking paper, roll tightly into a log shape then twist the ends
  • Freeze until firm

Suggested uses

Melt onto meat, fish or veggies. Spread on toast or crumpets

Image result for Chilli & parsley butter

CHILLI GARLIC AND PARSLEY BUTTER

Ingredients

  1. 250g block butter
  2. 2 fresh red chillies(hot), chopped
  3. 1/4 cup parsley leaves, chopped
  4. 2 cloves garlic, finely chopped
  5. Salt to season

Method

  • Chop butter, then in a bowl season with chillies, garlic, parsley and salt. Mash to combine
  • Tip butter onto a piece of baking paper, roll tightly into a log shape then twist the ends
  • Freeze until firm

Suggested uses

Melt onto meat, fish or veggies. Spread on toast or crumpets or sourdough bread

Image result for CORIANDER AND GINGER BUTTER

CORIANDER PEPPER AND GINGER BUTTER

Ingredients

  1. 2 sticks unsalted butter, at room temperature
  2. 2 tablespoons freshly chopped coriander
  3. Lemon rind from one lime
  4. Grated 1 inch piece of ginger
  5. 1 teaspoon cracked pepper
  6. 5 cloves garlic, minced
  7. 1/4 teaspoon salt or to taste

Method

  • Chop butter, then in a bowl season with coriander, ginger, lemon rind pepper
  • and salt. Mash to combine
  • Tip butter onto a piece of baking paper, roll tightly into a log shape then twist the ends
  • Freeze until firm

Suggested uses

Melt onto meat, fish or veggies. Spread on toast or crumpets or sourdough bread

Image result for HONEY MUSTARD AND CHILLI BUTTER

HONEY MUSTARD AND CHILLI BUTTER

Ingredients

  1. 2 sticks unsalted butter, at room temperature
  2. 2 tablespoons freshly chopped green chillies
  3. 2 tablespoons Honey
  4. Grated 1 inch piece of ginger
  5. 1 tablespoon English Mustard
  6. 1/4 teaspoon salt or to taste

Method

  • Melt the butter in a bowl, then in a bowl season with green chillies, honey, mustard and salt. Mash to combine
  • Tip butter onto a piece of baking paper, roll tightly into a log shape then twist the ends
  • Freeze until firm

Suggested uses

Drizzle onto meat, fish or veggies.

 
Leave a comment

Posted by on February 21, 2021 in Contemporary, Smart Cookie


Golden Croutons


Roast Garlic with Croutons - Window To News

I don’t know about you, but I love croutons on my soup. Hot soup with crisp croutons makes for a great winter dinner.

I used to generally buy the crouton and when I ran out, I was too lazy to make my own. Trusted AirFryer to rescue! I realised, not only is it super easy, but that I can innovate and make different flavours to add to my soup! Not only can I innovate with the flavour but also the bread. I have tried Foccacia, plain white bread, whole meal bread and sourdough bread. Since it is so quick, I just use left over bread… the drier the better!

I have tried I have listed a few a few different variations. Add your favourite herbs to give it your unique signature. Here are some of my favourite crouton recipes in my trusted AirFryer… but don’t stick to these, try others and let me know which variations you tried!

Rosemary Croutons

Ingredients
4 slices of bread of your choice
2 Tblspn of Spreadable Butter or Olive Oil

AND

Rosemary Croutons

Ingredients
Dried Rosemary
Sprinkle of Pepper

Garlic Croutons

Ingredients
Dried Parsley
Sprinkle of Pepper
Garlic Powder

Parmesan Croutons

Ingredients

2 Tblspn of Olive Oil
Dried Thyme
1tbsp of Parmesan

Directions

In a large bowl, prepare a mixture of melted spreadable butter and dried herbs. Generously spread it over the cubed bread pieces.

Lay bread slices on top of each other and cut them into cubes using serrated knife . I cut them slightly larger as the bread slices would shrink in size a bit. You could leave the crumbs on or take it off as per your choice. I hate wastage so leave them on 🙂 Pour melted butter or oil and herbs of your choice in a bowl and whisk it. A dash of salt would enhance the taste but is not necessary. Put the bread crumbs in the bowl and mix till all the slices are nicely coated with the herb mixture.


Preheat the Philips Airfryer to 160C (320F) for 3 minutes. Once heated, place the bread cubes into the tray and air fry them for 8 minutes, remembering to shake it a couple of times in between. At this stage, the bread cubes will be slightly crispy on the outer surface and very light brown in color.
After 8 minutes, turn up the heat to 180 C (356F) and airfry for a further 4-6 minutes checking every now and then.

Perfectly browned Croutons will be ready to serve with your salad or heartwarming soup.

 
Leave a comment

Posted by on May 30, 2020 in Airfryer, Contemporary, Smart Cookie


Tags: ,

Airfryer – A New Way


For some time, I had been contemplating buying an air fryer. I’d seen air fryers touted on YouTube for several years, but I took it as a passing fad, like many (most) “unusual” kitchen gadgets. If you are anything like me you will understand when I say, I was sceptical about how a little tomb like machine could recreate the texture of fried food, with hardly any oil and without the splatter war-wounds to show for it?

Then on Mother’s Day 2020, I received this Philips Air Fryer.

Philips Digital Twin TurboStar Airfryer Black HD9742/93 | MYER

It is the Philips Turbostar with a 0.8lt capacity. It is on the pricier side, but the boys did A LOT of research, and convinced me that you truly get what you pay for. We are a small family and this size is fine and in case I have to feed more people cooking in two or three batches is hardly an issue. It is so quick and painless that before you finish one batch the next batch is ready!

So I have been working with this star for the past month. I have baked in it, fried in it and roasted in it and everything has turned out exactly as its original counterparts! And unlike frying, the wastage is nil too… I made Bitter gourd chips and I didn’t have to throw out the bitter oil after use (because there was none J ) and chips were perfect!

So let me list out why I love my new Airfryer….

It’s a LOOKER. Aesthetically speaking, it’s a winner! Sleek, black and on my black countertop, its barely visibly. And it is small enough to hide in a corner! So, a big tick from me for that!

It is EASY TO USE. Whatever the opposite of technologically savvy is, that’s me. And yet, I learned how to use the air fryer in all of 5 minutes. You choose your temp, you choose your time, you press go.

It is FAST. It takes me approximately 20 minutes less to make something in the air fryer versus the oven. As against frying it takes only 10-15 minutes per batch depending on the .

It is WASTAGE FREE. All that oil you use to deep fry and then toss away because it either gets smelly or has burnt… none of that anymore!

It is easy to CLEAN. All parts of the airfryer are dishwasher safe and can be stuck in the lower basket. But if I want, I can soak the basket and base in warm soapy water for 15 minutes, give it a spritz with my sink sprayer and voila! It’s ready for use. The machine itself stays clean as a whistle.

And most importantly, it WORKS. Are air fryer fries or chicken or golgappas identically to their oil-saturated counterparts? No. They’re almost as crunchy with the added benefit of not having any of that gross pop of grease. But they are noticeably crunchier and crispier than anything I’ve ever made in an oven. The air fryer also manages to texturize the outside of the food, while keeping the inside much more M-O-I-S-T than any other cooking method. The tandoori chicken was a prime example of this.

But no review can be complete without some negatives! I agree… And there are just a couple of downsides to the airfryer.

Firstly its size! I have the 0.8lt Philips Turbostar, which says it provides up to four servings. But really speaking, if you follow instructions and leave some room on the side to allow air circulation, you can make up to two servings per batch of food. This as I said, is not really an issue as it is fast enough to put together two batches in a jiffy. But, whilst the cooking area of the air fryer is on the small side, the overall footprint is rather large — about the size of an InstaPot or CrockPot. And, dismantled, the basket takes up about half of the top drawer of my dishwasher! So I land up handwashing it most of the time which is not a problem as it is non-stick and soaking it in soapy water for 10 minutes gets rid of everything.

The second thing is the noise. The fan that circulates the air in the fryer and crisps everything up so perfectly is on the louder side, at least in my model. The Philips web site says the fan noise can be up to 65 decibels, comparable to a vacuum cleaner. That sounds about right to me. You do have to increase the volume of your TV when something’s cooking.

But that aside, I have no issues with my new baby!

I have now consistently used and loved my air fryer for almost a month, and I am a self-professed airfryer junkie. I experimented with many air-fryer recipes. I loved them all. Crispy chickpeas were perfect and easy as 1-2-3 — just drain and dry a can of chickpeas, add some oil and herbs, and fry them up for a few minutes. And because they’re so small, I had plenty of room in the fryer basket to cook the whole can in one go and still have room for the air to circulate!

Same for French fries and sweet potato chips — they all came out great. I simply peeled and chopped the roots, soaked them in cold water and dried them in a towel to remove any moisture, then air-fried them with a little oil and salt for 15-20 minutes, shaking them once or twice as they cooked. As a side dish for two people, I could easily fit plenty of fries in my air fryer. I think just about any “sturdy” vegetable like beetroot or cauliflower would air-fry up nicely with a little bit of oil and salt.

Air Fried Sweet Potato Chips — Aneissa
No photo description available.

Golgappas and Gulabjamuns were the other success stories — super easy, crispy, and delicious. The golgappas didn’t break even after adding the pani! Absolutely no mess and no oil! The Gulabjamuns were cooked perfectly right up to the centre. Moist and perfectly shaped, they too maintained their shape even after soaking in the syrup!

Image may contain: food

I will start posting my recipes here as I get to them… so don’t forget to subscribe to this blog for latest and greatest recipes!

Happy Airfrying!

 
Leave a comment

Posted by on May 27, 2020 in Airfryer, Contemporary, Smart Cookie


Tags: , ,

Chickpeas Shundal


My newest dish in the Instapot is Chickpeas shundal. You can simply use canned Chick Peas or any other bean of your choice)

Shundal is a snack made with a bean and tempered with Coconut and Curry Leaves. It is super healthy snack, high in protein, fiber and calcium. It has a low glycemic index and therefore a little goes a long way in keeping you full and free of temptation to eat that chocolate.

Traditionally Shundal (pronounced Shoe+n+dull)  is a staple dish served in South Indian homes during the Navaratris that falls around the first week of October. The 9 days (Nav+Ratri) celebrates women in the form of goddesses and women dress up and visit each other’s homes wearing lovely colourful sarees and jewellery.

Making it in the Instapot was a dream!!! I could never get the texture right the traditional way. But the Instapot made it so easy and perfect!!! So I will share the recipe with you!

Sundal Recipe: How to Make Sundal

Equipment

  • Instant Pot

Ingredients

  • 1 cup small chick peas
  • 3 Tbsp Water
  • 2 Tsp Ghee or Coconut oil
  • 1 Tsp Mustard seeds 1 tsp
  • 2 Red chillies
  • 1/2 Tsp Asafoetida
  • 5 Curry leaves
  • 3/4 Tsp Salt
  • 1/3 Cup Fresh coconut

The Chickpea

  • Soak the Chick peas in 3 cups of water overnight. In the morning, drain the water, wash it thoroughly.
  • Add salt
  • Cook in Instapot under Pressure Cook mode for 15 minutes.
  • Allow to release pressure normally

You can skip this whole bit by just using a can of chick peas or any other beans you like.

To Temper

  • Heat a saucepan and add the ghee or coconut oil to it.
  • Once it heats up add the mustard seeds and broken red chillies.
  • When the mustard seeds start to splutter add the curry leaves and asafoetida and mix well.
  • Add the cooked Chickpeas to this.
  • Turn off the heat and add the fresh coconut and mix well.
  • Serve warm

Notes

  • You can add green chillies instead of red chillies
  • You can use any cooking oil though ghee or coconut oil are the healthy options
  • Soaking overnight is mandatory for this legume.
  • You can use any bean of your choice, Balck eyes beans, Soya Beans, Kidney beans are some common ones used
  • Adjust the salt according to your taste


Leave a comment

Posted by on April 28, 2020 in Contemporary, Smart Cookie


Easy Peasy Ghee (InstaPot version)


I have been making  stove top ghee for 30+ years. Last year my husband bought me an InstaPot. With a lot of scepticism, I made ghee in the Instant Pot after 6 months. It was so easy that I have never looked back.

Although stove-top version has worked brilliantly for the past so many years, it’s hard to predict the exact cooking time and temperature. It is easy to burn the ghee if you turn away for just a moment.

I have many friends and family who have requested a recipe of how to make ghee in the InstaPot.

Why Instant Pot:

  • Cooks consistently each time
  • Makes the process easy & fool-proof
  • Hands-free

InstaPot Ghee Cook times:

I have tried to capture the images as the ghee is being cooked every 2 to 3 minutes and the different stages the butter goes through. Turn the Instant Pot off when you see all that white, milky froth disappear. And allow to sit.

  • Place unsalted butter in the InstaPot. Set InstaPot to Sauté Normal mode.
  • Set the timer to 14 minutes
  • Depending on whether the butter was in the fridge, freezer or room temperature, the butter will melt in 5-8 minutes.


i ghee-1.jpg

  • As butter melts, the water will start to evaporate.
  • As water evaporates bubbles will appear on the surface, followed by white foam.
  • The foam is the milk solids that will start to brown.
  • If the Instapot beeps before the foam browns turn it back on to about 4 minutes.
  • Remove from heat.


ghee-5-8.jpg

  • When cool, strain the Ghee through a seive and cheesecloth.


How to Make Clarified Butter (Ghee)!


Note:  Here are the cook times that have worked for me for unsalted butter using the Instant Pot Sauté Normal mode:

  • 500g – 9 minutes
  • 1Kg – 15 minutes


Leave a comment

Posted by on April 20, 2020 in Contemporary, Smart Cookie


Pepper Broccauli Fry


A close up of a sheet pan full of vegetables that have been roasted. There are cauliflower and broccoli florets, red and yellow bell pepper strips, and roasted cashews. Teh sheet pan is garnished with thin slices of green onion, black sesame seeds, chive blossoms, and basil blossoms.

A delicious, fast to cook and great to eat veggie bursting with colour! Ghee is the healthy option, but you can replace the Ghee with an oil of your choice…

INGREDIENTS

FOR MASALA POWDER:

  • 1tbsp pepper
  • ½tsp Fennel / saunf
  • ½tsp Cumin / jeera
  • ½tsp Coriander seeds

OTHER INGREDIENTS:

  • 1tbsp Ghee
  • 2dried red chilli
  • 1-inch ginger
  • ½onion, sliced
  • ½ red & yellow Capsicum, sliced
  • 150g Broccoli
  • 150g Cauliflower
  • Salt to taste
  • Spring Onions
  • Roasted Onion Seeds

INSTRUCTIONS

  1. Roast & grind pepper, fennel, cumin and coriander seeds to a fine powder and keep aside.
  2. In a wok, heat mustard oil and splutter mustard
  3. Add 2 dried red chilli and ginger.
  4. Add onion & saute until onions shrink slightly
  5. Add capsicum and stir fry for 2 minutes.
  6. Add Broccoli and Cauliflower and stir fry on high flame.
  7. Finally, add the prepared pepper masala powder and salt.
  8. Mix well making sure the spices coat the veggies well.
  9. Garnish with roasted Onion seeds and chopped spring onion and serve Pepper Broccauli fry with phulka or Turkish bread.


Leave a comment

Posted by on March 22, 2020 in Contemporary, Smart Cookie


Rawsome Goodness


Ever heard of, “feed the mum and you’ve fed the baby”? That’s because whatever you eat when you are lactating, the milk you nurse has all the nutrients from the ingredients you eat! Cool huh?!?!?!

So to keep your baby happy, less gaseous and help with colic, the mother needs to eat good nutritious food which is easy to digest. Ayurveda suggests many teas to enhance digestion for the bub and mum… which I will talk about in the next post.

But the important thing is the production of milk! As the baby grows he needs more and more to keep him growing, happy and healthy. Nature once again comes to the rescue! There is a tonne of stuff available in nature that can enhance production of milk, e.g. milk, peanuts, oats, garlic and other such foods.

Here’s a simple “Boobie Smoothie” (its so simple you can do it with one hand when the other is holding a crying baby!) that can fill up a busy mum on the go quite easily and help with production of abundant and nutritious milk rich in Vitamins, Proteins and essential fatty acids – good for healthy disease free skin, strong bones, nail and hair and healthy nervous system.

So here we go….

Ingredients

  1. 1/2 cup    – Rolled/ Stone Cut Oats
  2. 1 tbsp      – Organic Ground Flaxseed
  3. 1 tbsp      – Organic Peanut Butter
  4. 1 cup       – Banana (and/or seasonal fruits or berries)
  5. 6 shelled – Walnuts
  6. 1/2 cup    –  Almond/Macadamia Milk
  7. 1/2 cup    – Skim Milk
  8. 1/2 tbsp   – Raw Organic Honey
  9. A pinch   – Cinnamon

Method:

Blend together into a delicious thick shake and drink at room temperature!

Note: Remember if you have a good blender (Vitamix, Nutri Ninja) you can actually use Almonds and Macadamia instead of ready milks! Just replace 1/2 cup Almond/Macadamia milk with the nut/nuts and 1/2 a cup of water and blend with the rest!


Leave a comment

Posted by on August 21, 2019 in Contemporary, Smart Cookie


Tags: , ,

DeeKeto Cutlet


One of my most favourite dishes is a Delhi street food called Tikki Choley! Its a potato cutlet doused in chick pea curry. Crisp yet soft, savoury with a tangy sweet sauce and crisp pink onion and tomato salad on top!

My DevaKeto diet motivated me to make a vegan, low carb high protein cutlet that tastes exactly like its original counterpart (which is made from potatoes). It is nutritious and filling without compromising on taste!

And the best thing is that it is easy as 1-2-3!

INGREDIENTS

  1. 1 cup – soya chunks
  2. 1 – onion, medium sized
  3. 1- grated carrot
  4. 2 tbsp corn kernel
  5. Few  broccoli and cauliflower flowerets grated
  6. 1/2 tsp – Red Chilli powder
  7. 2 tbsp – Coriander leaves
  8. 2 tbsp – millet, powdered
  9. Oil – 3 tbsp or as required to toast/deep fry
  10. Salt – to taste

For coating:

4 tbsp – coarsely ground oats

METHOD

  1. Soak soya chunks in boiling water for 15-20 minutes. Wash thoroughly.
  2. Drain water completely and squeeze to remove excess water and mash or process in food processor.
  3. In a wide bowl, mix the  soya chunks, chopped onion, grated carrots, broccoli, cauliflower, corn kernels, coriander leaves, red chilli, garam masala powder, required salt and mix well.
  4. Add the millet powder to bind together and make small round or oval shaped patties.
  5. Dip it in the coarsely ground oats until coated well on both the sides.
  6. Heat a pan with oil and cook it on both sides until golden brown.
  7. Serve hot on its own or with chaney and meethi chutney garnished with onions, tomatoes, coriander and boondi or sev.
 
Leave a comment

Posted by on September 23, 2017 in Contemporary, Smart Cookie


Iced Tea


54ead82b99fe3_-_everything-you-need-to-know-about-iced-tea-mdnStudies show that drinking tea regularly may reduce your risk of Alzheimer’s and diabetes and promote healthier teeth and gums and stronger bones. How? Tea is rich in antioxidants called flavonoids, which are most potent when tea is freshly brewed.

There is no better way to have tea than to brew it yourself. When you make your own iced tea at home instead of using a powdered mix or buying it bottled or from a fast-food restaurant or coffee shop not only do you save money but can also control the calories by limiting how much sweetener you add (or by not adding any at all).

The added benefit of having this crisp and cool beverage is that it cuts down craving for foods rich in sugar! So here’s how you do it

INGREDIENTS

  • 1/2 cup fresh mint leaves
  • 3 green tea bags
  • 2 tablespoons honey
  • 4 cups boiling water
  • Juice of half a lime

PREPARATION

  1. Pour boiling water in a pitcher filled with mint leaves, tea bag and honey.
  2. Let steep for 5 minutes; remove tea bags.
  3. Refrigerate until chilled.

VARIATION

You may use any flavoured tea bag for example, Peppermint, Chamomile, Apricot, Jasmine as a variation. You may chop fresh fruit and allow to steep with tea for a more natural and fresh flavour.


Leave a comment

Posted by on March 2, 2017 in Contemporary, Smart Cookie


Tags: , , , ,

Flax Seed Molagai Podi


imagesFlax seeds are among the world’s top 127 Health food items. It is the number one source of omega-3 fatty acids while also being rich in Lignans and fiber. The omega-3 essential fatty acids helps combat heart diseases, diabetes and menopause related problems. They are a very good source of dietary fiber,energy-producing vitamin B1 and free radical-scavenging manganese. The antioxidant and anti-inflammatory benefits of flaxseeds also make them a logical candidate for cancer prevention and migraines.  

Here’s a fast to cook and good to eat recipe for a chutney powder. Eat smothered in gingelly oil with idlis and dosais, or smother on top of pan fried gluten free bread for a healthy breakfast/snack option

INGREDIENTS

Urad dal – 1 1/2 cups
Chana dal – 1/2 cup
Flax seeds – 1/4 cup each
White Sesame seeds – 1/4 cup
Red chilies – 10 to 15
Asafoetida – 1 tsp
Powdered Jaggery – 2 Tbsp
Oil – 2 tsp
Salt – to taste

METHOD

  1.  Dry roast the flax seeds and sesame seeds in a skillet, on low flame until light golden brown.  Seeds will start popping after 2 minutes.  Transfer the seeds to a plate to cool.
  2. In the same skillet, add the oil, urad dal, chana dal and red chillies.  
  3. Roast on a low flame until golden brown.  Make sure to keep stirring while roasting.  This will take about 8 to 10 minutes.
  4. Switch off the flame and add asafoetida and mix well.
  5. Let it cool completely.
  6. Add required salt and grind the cooled dal, sesame – flax seed mixture and jaggery into a coarse powder.
  7. Mix the powder well.  Let it cool completely before storing in a dry, airtight container.
  8. Serve with Sesame oil (nallennai).

VARIATIONS

You can add a i1/4 cup of chia seeds for protein. It also helps in filling you up as it is a low GI food. You may eliminate jaggery if you are cutting down on sugar intake. I like to add some curry leaves dry roasted and powdered with the rest of the ingredients. 

11372437_752960911491374_1749999934_n

 
Leave a comment

Posted by on March 2, 2017 in Contemporary, Coventional, Smart Cookie


Tags: , , ,

 
Women in Bollywood

A journey through heroine-oriented cinema